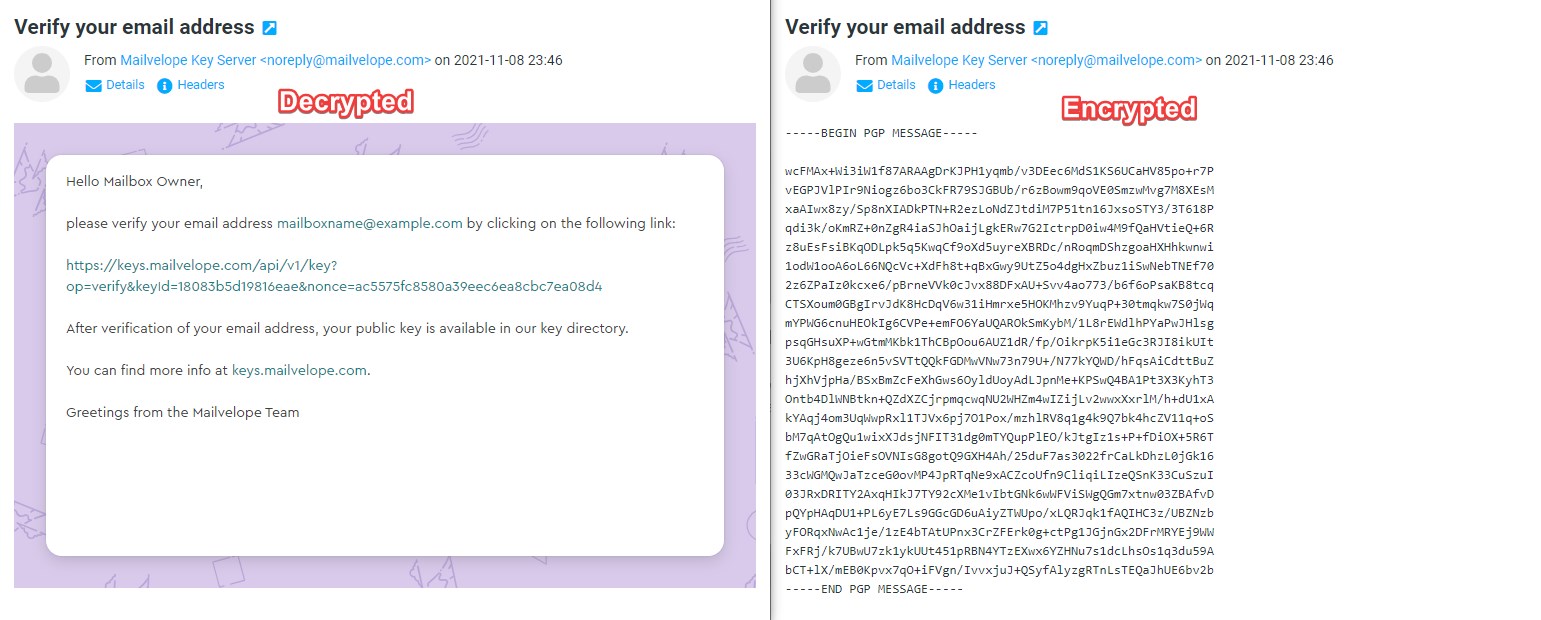
Sending and reading encrypted messages via Roundcube Webmail
- General information
- Configuring Mailvelope
- Sending encrypted messages (and files)
- Reading encrypted messages
General information
The only way to ensure that the messages you send and receive are private to you and the intended recipient(s) is to encrypt them. You can enable end-to-end message encryption with minimal effort using the Roundcube webmail client and the Mailvelope browser extension/add-on. Mailvelope uses the OpenPGP standard, which has been labeled as secure for many years and is open-source; this means you can communicate privately with other email addresses which use OpenPGP standard-supported software.
Note: This encryption method allows you to encrypt only the message body and attachments. The information in the message headers (sender, recipient, timestamp, etc.) cannot be encrypted.
Configuring Mailvelope
To configure Mailvelope to work with the Roundcube webmail client, you need to follow these steps:
- Download the Mailvelope browser extension/add-on through the official website, and enable it. Currently, the Mozilla Firefox, Google Chrome, and Microsoft Edge browsers are supported.
- Access your mailbox using the Roundcube webmail client. Detailed instructions are available in the Logging into webmail article.
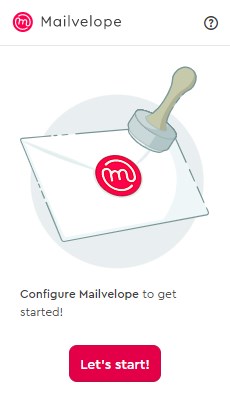
- Open the extension, and press the Let's start button.
- A new window will appear in your browser, where you can generate a new key pair for your email address or import an existing one.
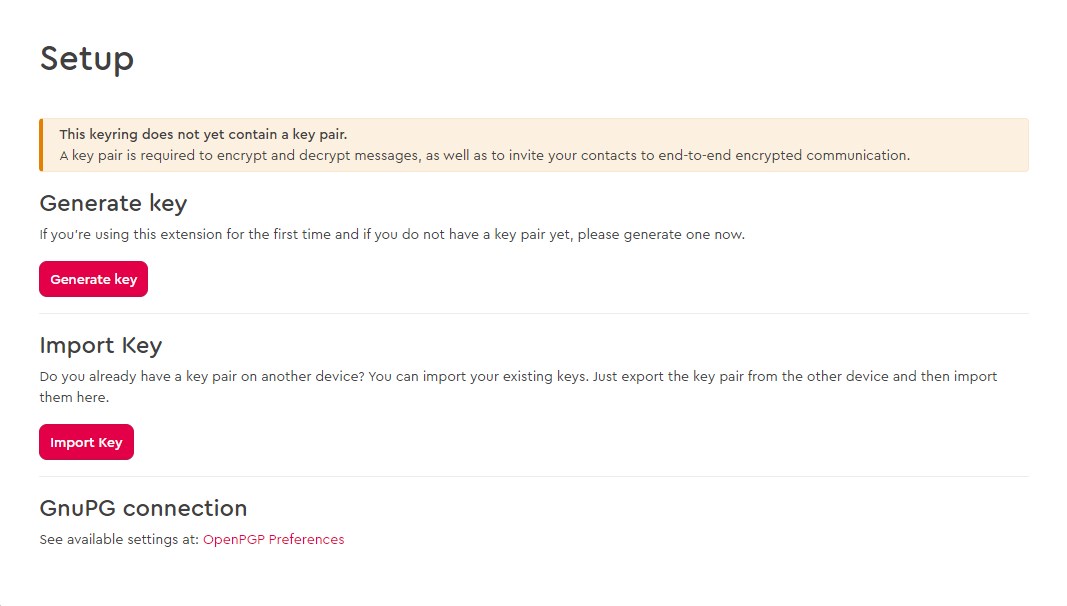
You can import existing keys as files or text. If you do not have existing keys, you must create a new key pair by supplying the following settings in the extension:
• Name - the name that will be displayed as the key owner. It will be visible to all participants in the encrypted communication.
• Email - your full email address (e.g. mailboxname@example.com).
• Enter/Re-enter Password - the password for your private key.
You can leave the Advanced settings unchanged.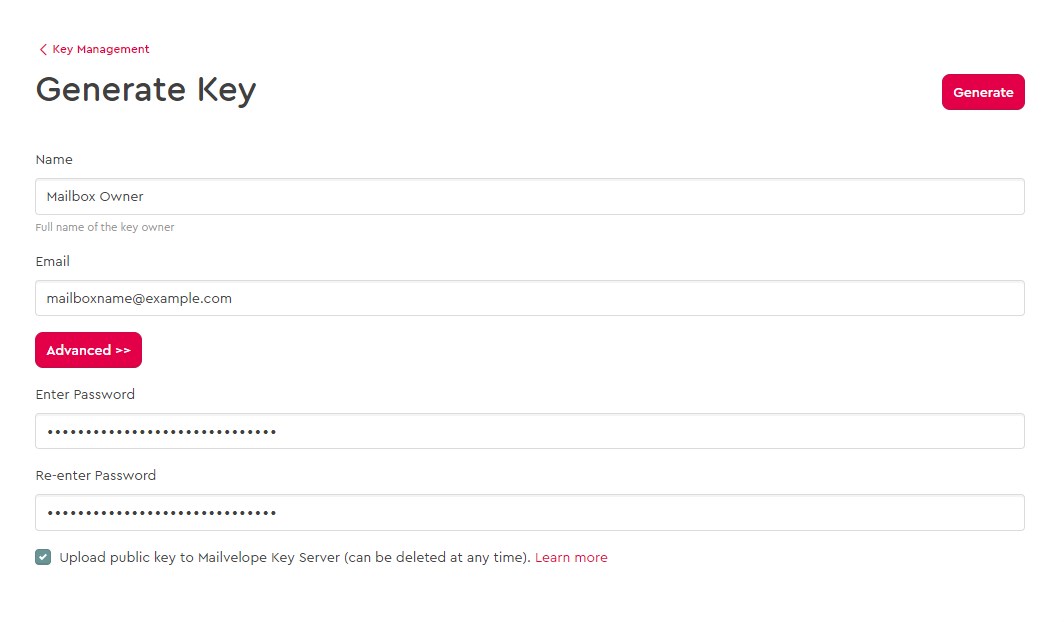
Press the Generate button once ready, and your new key pair will be added to your Mailvelope keyring.
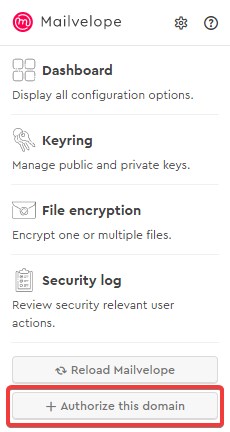
Note: After a new key pair is added to your keyring, an encrypted verification message will be sent to your email address which allows you to add your public key to the Mailvelope Key Server. More information on how to read encrypted messages is available below in the Reading encrypted messages section of this article. - Navigate to the Roundcube webmail client and open the extension again. A new menu will appear where you should select the + Authorize this domain button.
- A new tab/window will appear with the correct settings already filled. You only need to enable the API toggle, and press the OK button.
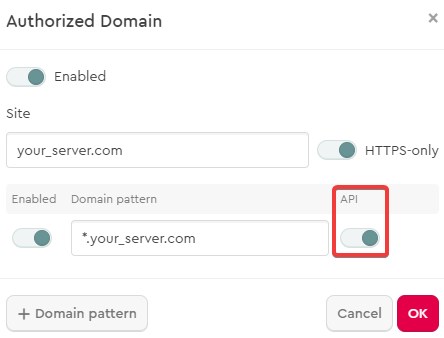
Note: If you access your mailboxes via Roundcube using the server domain (e.g. mbox.your_server.com) and your own domain name (e.g. mbox.example.com), you should authorize both of them.
Sending encrypted messages (and files)
Once you have configured Mailvelope on your browser, you can send encrypted messages in a few simple steps:
- Access the Roundcube webmail client with your mailbox.
- Open the Compose task from the main menu to compose a new message.
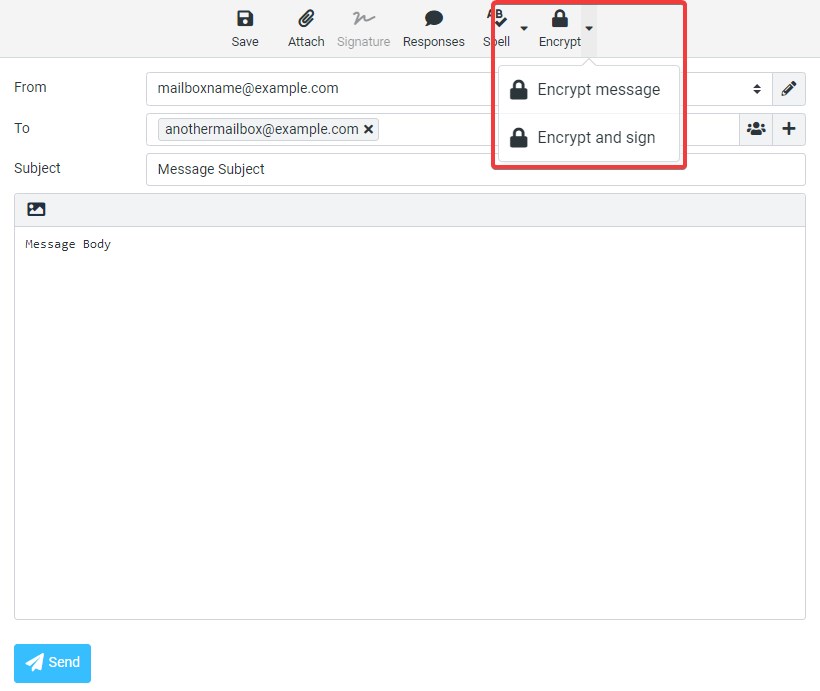
- Click on the Encrypt button from the top toolbar to encrypt the message (and sign it). If you wish to encrypt and sign the message, click on the downward pointing triangular arrow next to the Encrypt button and select the Encrypt and sign option.
Note: The Encrypt button will be inactive if the message editor type is set to HTML as encryption is supported only for plain text messages. To set the editor type to Plain text, press the X button in the top-left corner of the message field.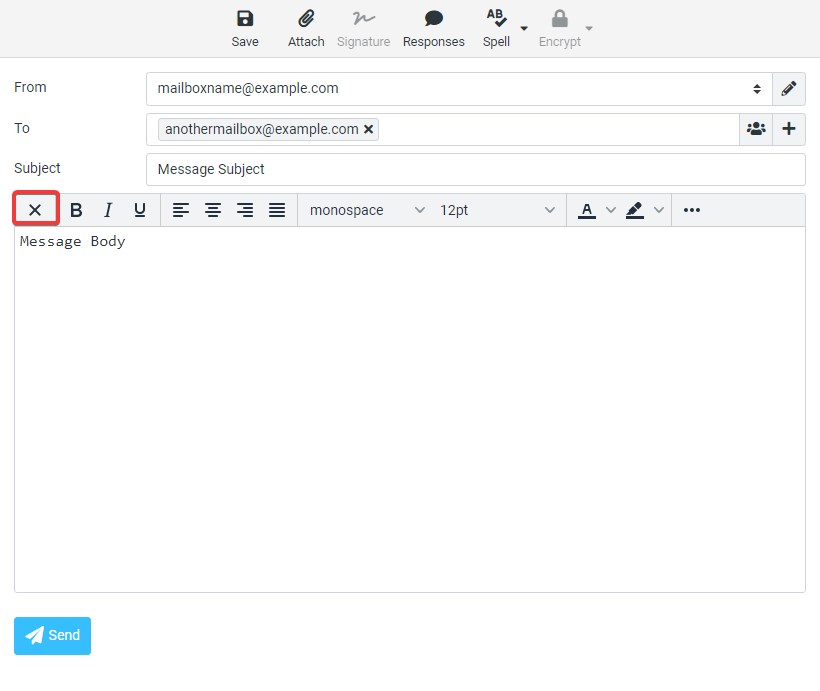
Encrypted and signed messages will display your name and email address as you have listed them in your private key when opened by their recipients. This will help ensure the recipients that you are the actual sender of the encrypted messages.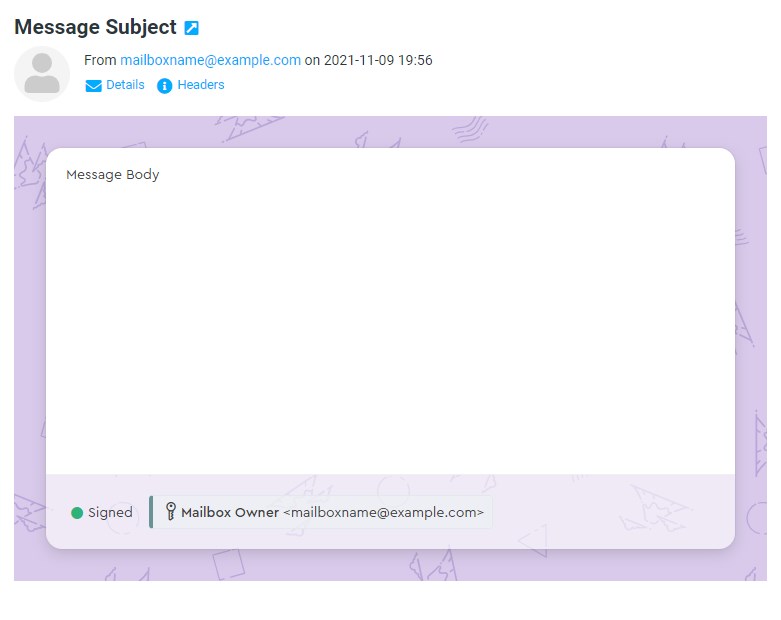
Additionally, you can enable automatic signing of all outgoing encrypted messages in the Mailvelope extension with the Sign all outgoing messages. setting under the General tab of the Options menu.
- Enter your message in the message field. If you wish to attach private files, you should add them to the attachment area of the encrypted message field. Attaching files to messages the normal way will result in unencrypted attachments sent to the recipient of your message.
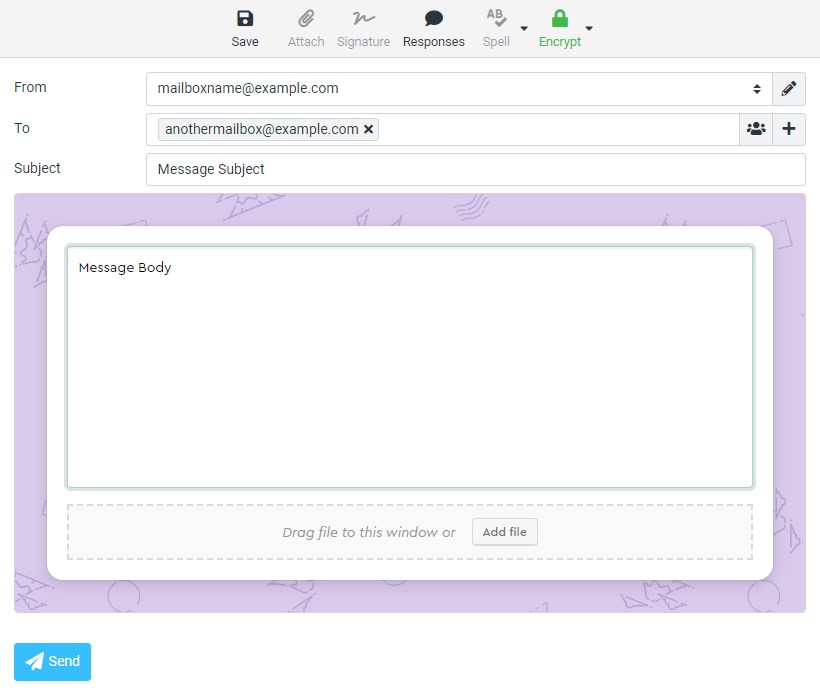
- When you are ready, click on the Send button to send your message. A new window may pop-up asking you to enter the password for the private key of your mailbox.
If you plan to send mostly encrypted messages, you should set the message editor type to Plain text by opening the Settings task from the main menu, selecting the Preferences setting, clicking the Composing Messages option, and changing the Compose HTML messages setting to never.
When you send an encrypted message to a mailbox whose public key is not in your keyring, a new window will pop up, asking you to confirm their public key.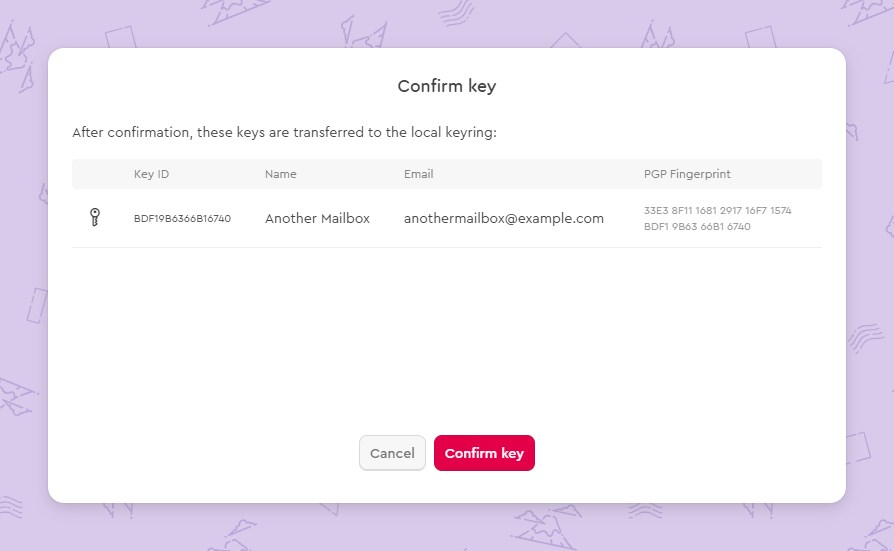
Reading encrypted messages
To read encrypted messages after you have configured Mailvelope on your browser, you should access your mailbox via the Roundcube Webmail interface, open the Mail task from the main menu, and click on the specific message from the message list. A window may appear where you should enter the password for the private key of the recipient's mailbox.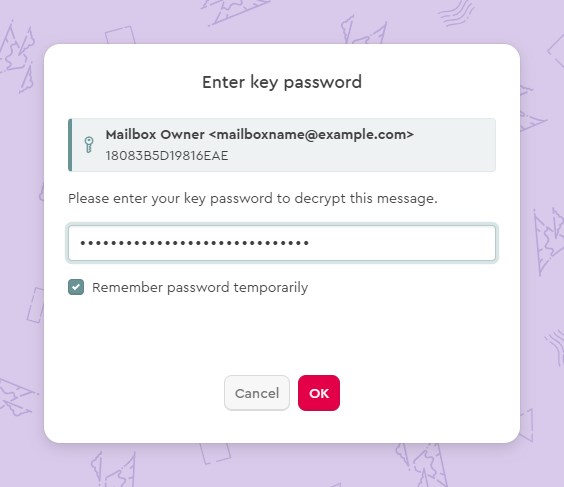
If you do not have the correct public key of the sender and the correct private key of the recipient's mailbox in your keyring, you will be unable to decrypt and read the message.
