Uploading with FileZilla
Automatic configuration
- Visit the FTP Manager in the hosting Control Panel.
- Click the Config File button there for the FTP user you wish to connect with.
- Click the Download config file button to download the XML configuration file to your local computer.
- Use the File/Import menu of FileZilla to import the configuration file to the program.
- Use the Site Manager of FileZilla to connect with the newly imported configuration.
Manual configuration
- Open FileZilla.
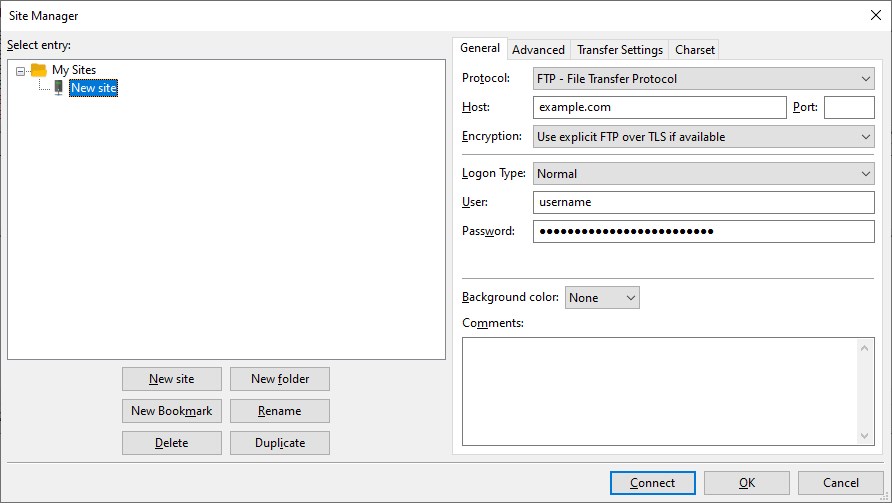
- Click File > Site Manager > New Site.
- Type your domain name in the Host field, e.g. example.com.
- In the Protocol field leave the default FTP - File Transfer Protocol value.
- Select Normal for Logon Type.
- Specify the FTP login details you want to connect with in the User and Password fields. Normally, you would want to connect with your main Control Panel username/password pair. In case you want to connect with an FTP subuser you previously created at your Control Panel's FTP Manager section, you need to specify the login details for that particular user.

- Click on the Transfer Settings tab and set the Transfer mode to Passive.
- Mark the Limit number of simultaneous connections box, and set the value to five.
- Click Connect.
Once connected, you will see the list of your files on the server. You can upload your files there via drag-and-drop. To download, just do the opposite -- drag and drop from the server file list to a local folder on your computer.