Using Memcached with a web app
Memcached is a high-performance, distributed memory object caching system. It acts as an in-memory key-value store for small chunks of arbitrary data (strings, objects) from results of database calls, API calls, or page rendering. Memcached can improve the speed of your website or application by providing quick access to frequently accessed data. More information about it is available in the official Memcached documentation.
Important: If you do not have a WebApps section in the Control Panel of your account, then this tutorial is not suitable for your particular hosting environment. You can get in touch with us if you need further assistance.
This tutorial will show you how to install and use Memcached from within a web application in a few simple steps:
- Installing Memcached via SSH and the sureapp CLI tool or the hosting Control Panel.
- Enable Memcached support for the PHP version of your website.
- Activate object caching with Memcached for your scripts or website
If you follow this guide, Memcached will be accessible at /home/example/private/memcached/memcached.sock as a socket for Memcached on your website or in your application. You will need to replace example with the actual username of your hosting account.
Check if Memcached is already available
Memcached is available by default for some hosting plans. You can check if it is available for your account by running the following command via SSH:
telnet localhost 11211
If Memcached is available by default for your account, a message "Connected to localhost." will be displayed, which means that Memcached works at localhost (with IP address 127.0.0.1) on the default Memcached port (11211). To cancel the test connection to the Memcached server, you can type the "quit" command (without the quotes) and press Enter.
Install Memcached in a web application via SSH
To install Memcached on your account as a web application via SSH, follow these steps:
- Connect to your account via SSH.
- Create a directory for the Memcached project:
mkdir /home/$USER/private/memcached - Create the web application:
sureapp project create \
--engine custom \
--engine-version - \
--release-dir "/home/$USER/private/memcached" \
--start-cmd "/usr/bin/memcached -m 64 -s /home/$USER/private/memcached/memcached.sock -a 700 -c 256"\
memcached - Activate it:
sureapp service manage --enable memcached
Install Memcached in a web application via the hosting Control Panel > WebApps section
You can install Memcached in a web application using the hosting Control Panel > WebApps section.
- Access the WebApps section of your hosting Control Panel.
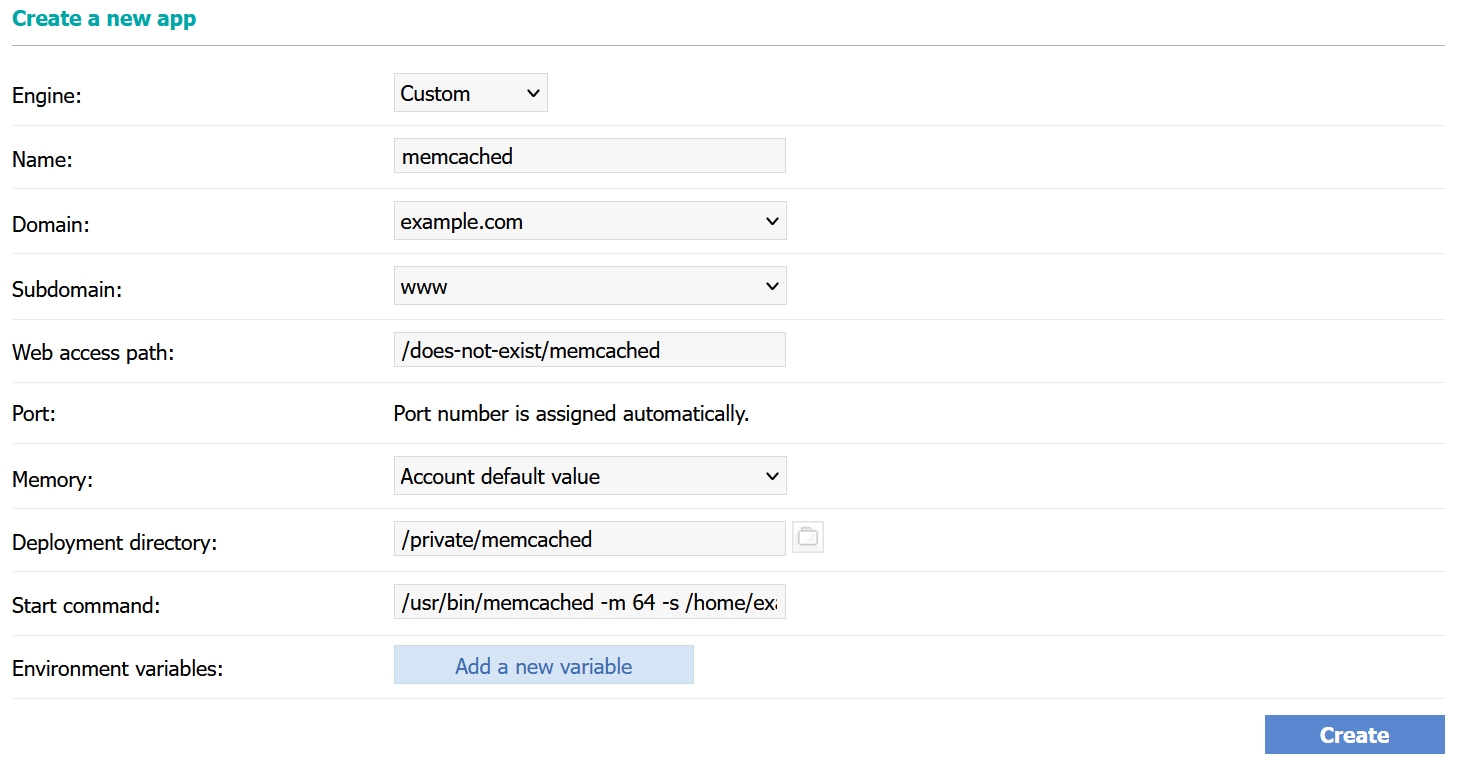
- In the form for creating new web applications use the following details:
Engine - Select Custom.
Name - Enter a name for your web application (e.g. memcached).
Domain - Select a domain of your choice from the drop-down menu.
Subdomain - Select a subdomain of your choice from the drop-down menu.
Web access path - Enter a directory/path that does not exist (e.g. /does-not/exist/memcached). If there is a file or a directory with the same name, it may stop working.
Deployment directory - Choose a directory for the Memcached web application (e.g. /private/memcached).
Start command - Enter "/usr/bin/memcached -m 64 -s /home/example/private/memcached/memcached.sock -a 700 -c 256" and make sure that you replace example with the username of your hosting account and /private/memcached/ with the directory you chose for the Memcached application.
- Press the Create button.
- Enable the web application by clicking on the button with a red circle (
 ) icon next to it.
Enable Memcached extension for PHP scripts
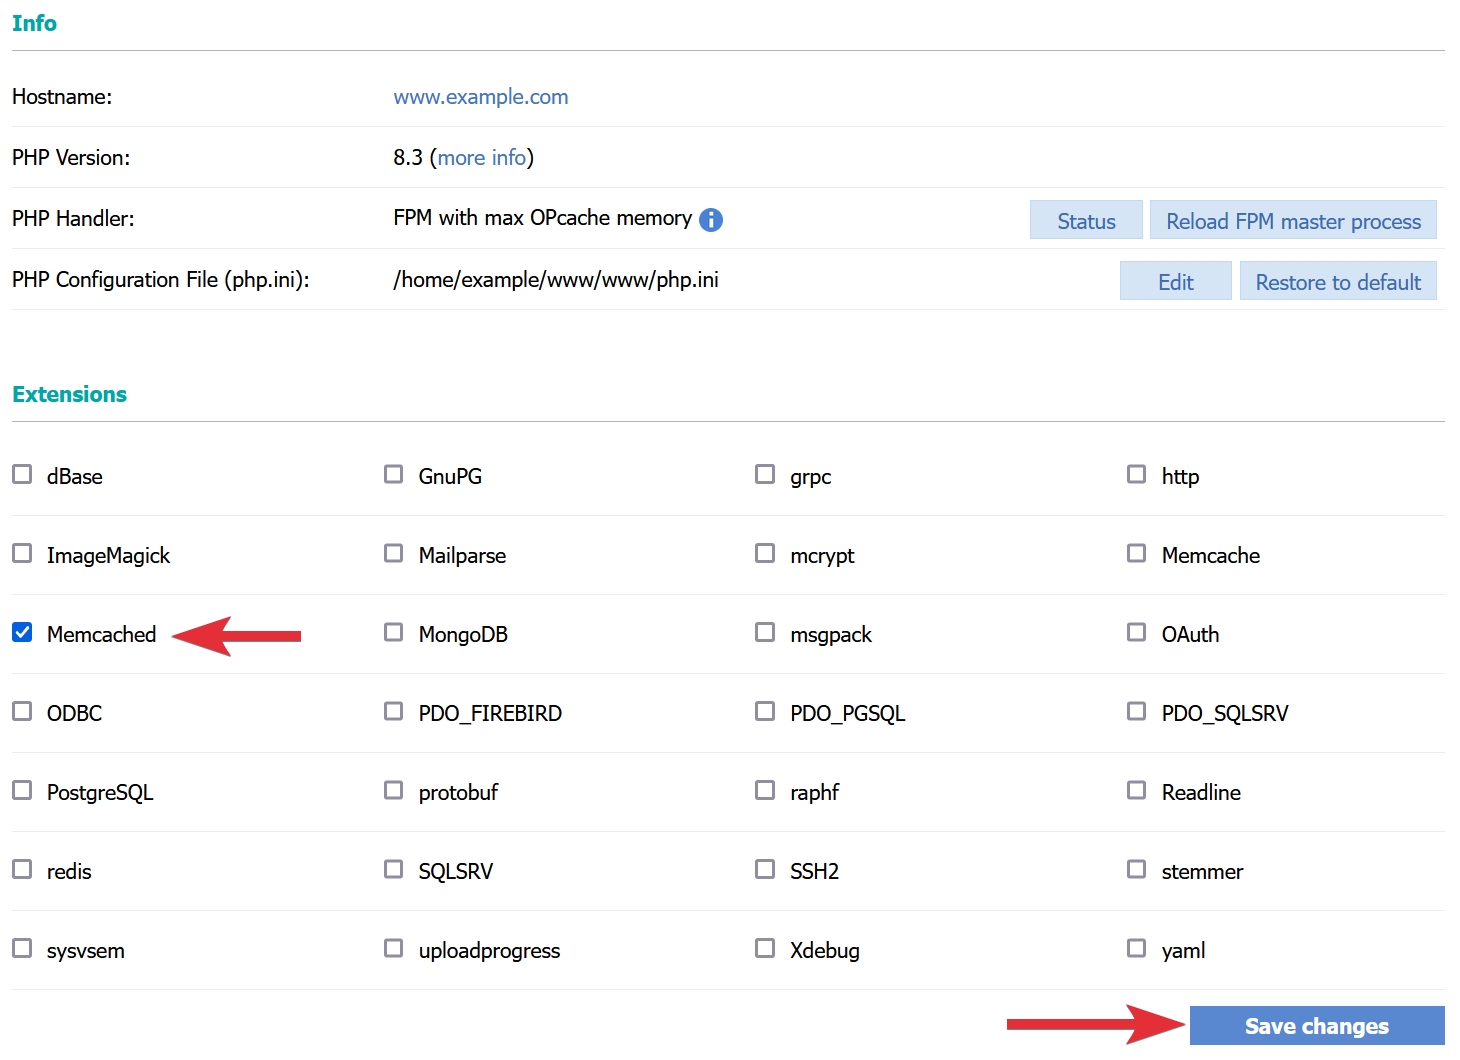
After you install Memcached in a web application, you need to enable support for Memcached in the PHP scripts of your website. To do this, you should go to the PHP settings section of your hosting Control Panel and press the Manage button for the corresponding subdomain (www is the subdomain for the main website). This will take you to the management page for its PHP settings where you need to select the "Memcached" extension and press the Save button.
Enable Memcached caching in your scripts or website
The last step to use Memcached is to activate it in your scripts or website. All you need to do is define the path to the Memcached socket in the Memcached settings of your script or software application. If your username is example and you installed Memcached in the /private/memcached/ directory of your account, your Memcached socked will be:
/home/example/private/memcached/memcached.sock
Detailed instructions on activating Memcached should be available in the official documentation of the script or software application that you use. If such information is not available, you should contact the developers or vendors of these scripts or software applications for further assistance.
WordPress and Memcached
To use Memcached on WordPress, you need to install a plugin that offers support for Memcached. One such plugin is LiteSpeed Cache. After it is installed on your website, you need to:
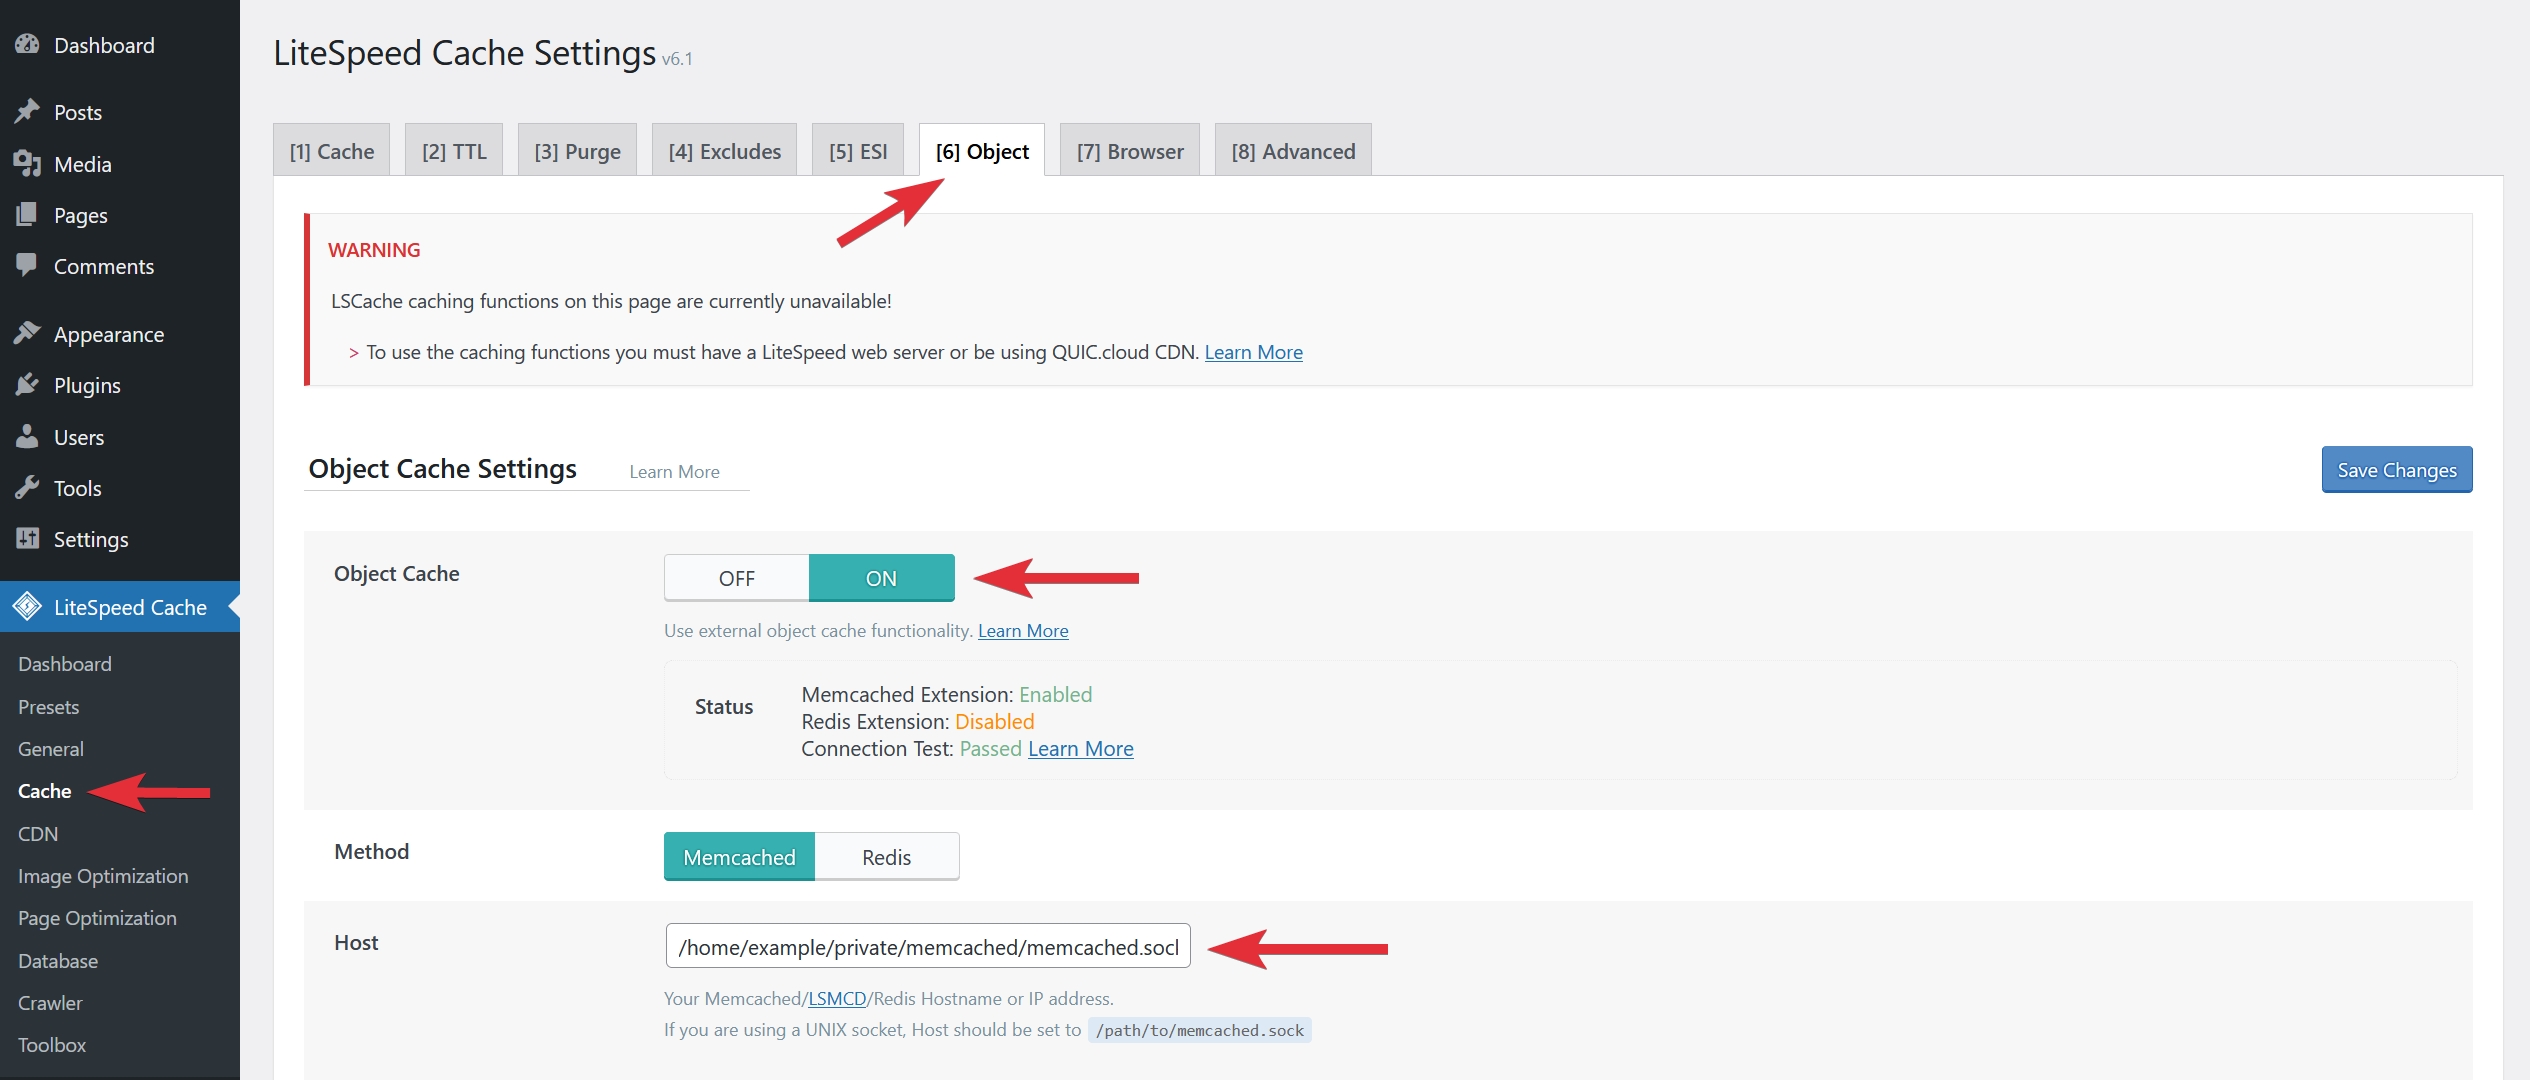
- Access the WordPress Dashboard as an administrator.
- Open the Cache section of the LiteSpeed Cache plugin.
- Navigate to the [6] Object tab.
- Enable the Object Cache.
- Enter the socket of your Memcached installation (e.g. /home/example/private/memcached/memcached.sock).
- Save the changes with the Save Changes button.

After the settings are saved, the information under Status should indicate that the Memcached extension is enabled and the connection test passed.
Joomla and Memcached
To enable support for Memcached caching on Joomla version 5, follow these simple steps:
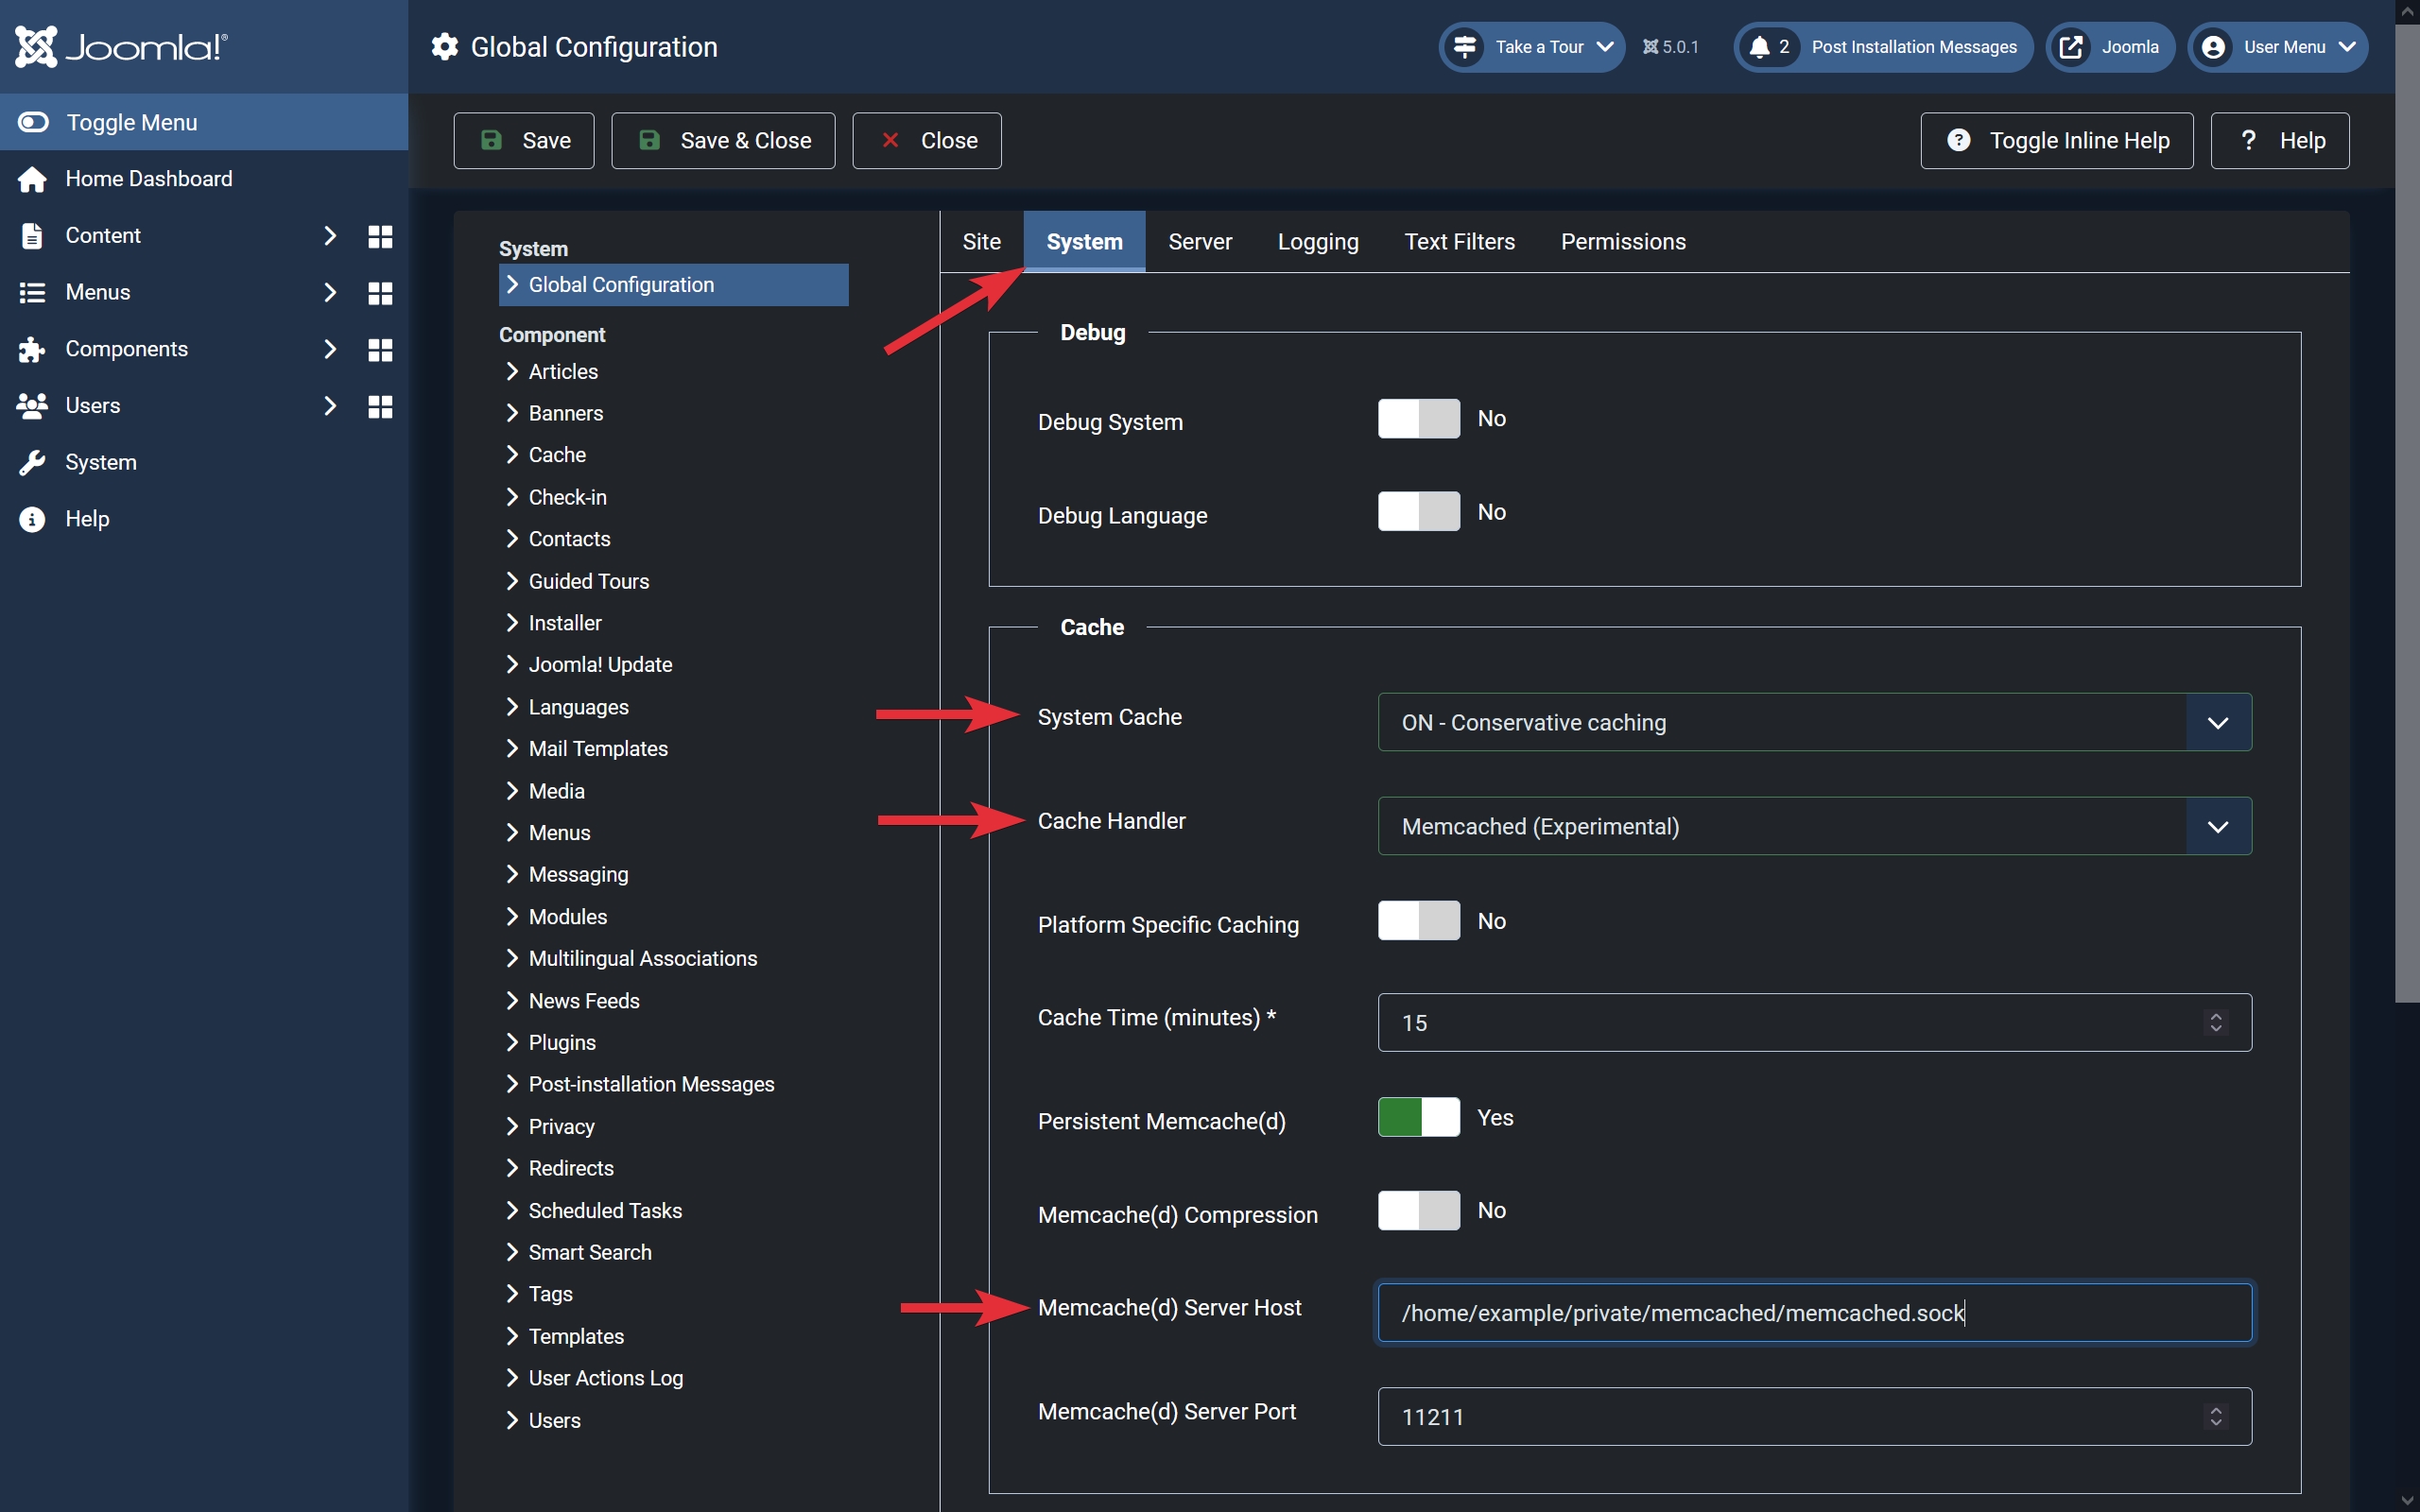
- Access the Joomla administration dashboard.
- Go to the Global Configuration page (System > Setup > Global Configuration).
- Navigate to the System tab.
- In the Cache section:
- Select ON - Conservative caching or ON - Progressive caching for System Cache.
- Choose Memcached (Experimental) for Cache Handler.
- Enter the socket of your Memcached installation (e.g. /home/example/private/memcached/memcached.sock) in the Memcache(d) Server Host field.
- Press the Save or Save & Close button to save the new settings.
