Setting up an Autoresponder/Vacation message
To add or modify an autoresponder:
- Open your web hosting Control Panel's Mail Manager section.
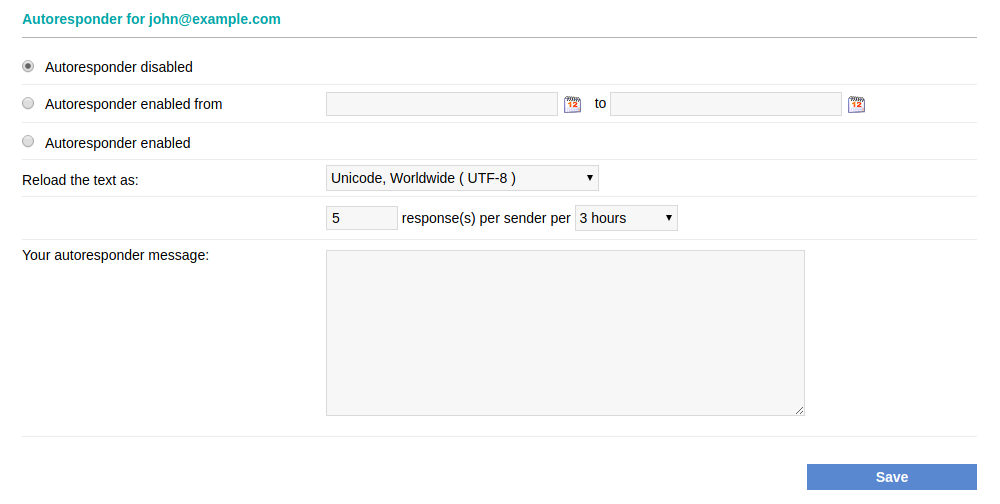
- Click the link under the Auto respond column (Yes/No) next to the mailbox, for which you wish to set or change an autoresponder.
- Enter the autoresponder message in the text box. Make sure that the Autoresponder enabled option is checked.
- Click the Save button.
If you wish to configure a time period, for which the autoresponder will be enabled, you can select the Autoresponder enabled from option, then use the two date fields to configure a start and an end date. Click the calendar icon for each field to select the desired month, date, and hour. Click the Save button when you are done.
You have the option to configure how many times an auto-response message will be returned to a sender within a given period of time. The default setting is 5 responses per 3 hours. This means that if the same sender sends multiple messages to your address, they will only receive five automated responses within 3 hours after the first message. The maximum response interval is 2 messages per 1 hour.
You can also configure the encoding for the autoresponder message using the Reload the text as drop-down selector. The default encoding is Unicode, Worldwide (UTF-8).
