Apple iPhone iOS 17 / iOS 18 (POP3 & SMTP over SSL)
To configure your iPhone for sending and receiving emails using POP and SMTP over SSL, follow these steps:
Before You Start:
- Email Address: Replace
username@example.comwith your actual email address. - Server Host: Replace
mail.your-server.comwith your server's host name (listed in your Control Panel). For example, if your server is s777.sureserver.com, your Server Host would be mail.s777.sureserver.com.
1. Add a Mail Account:
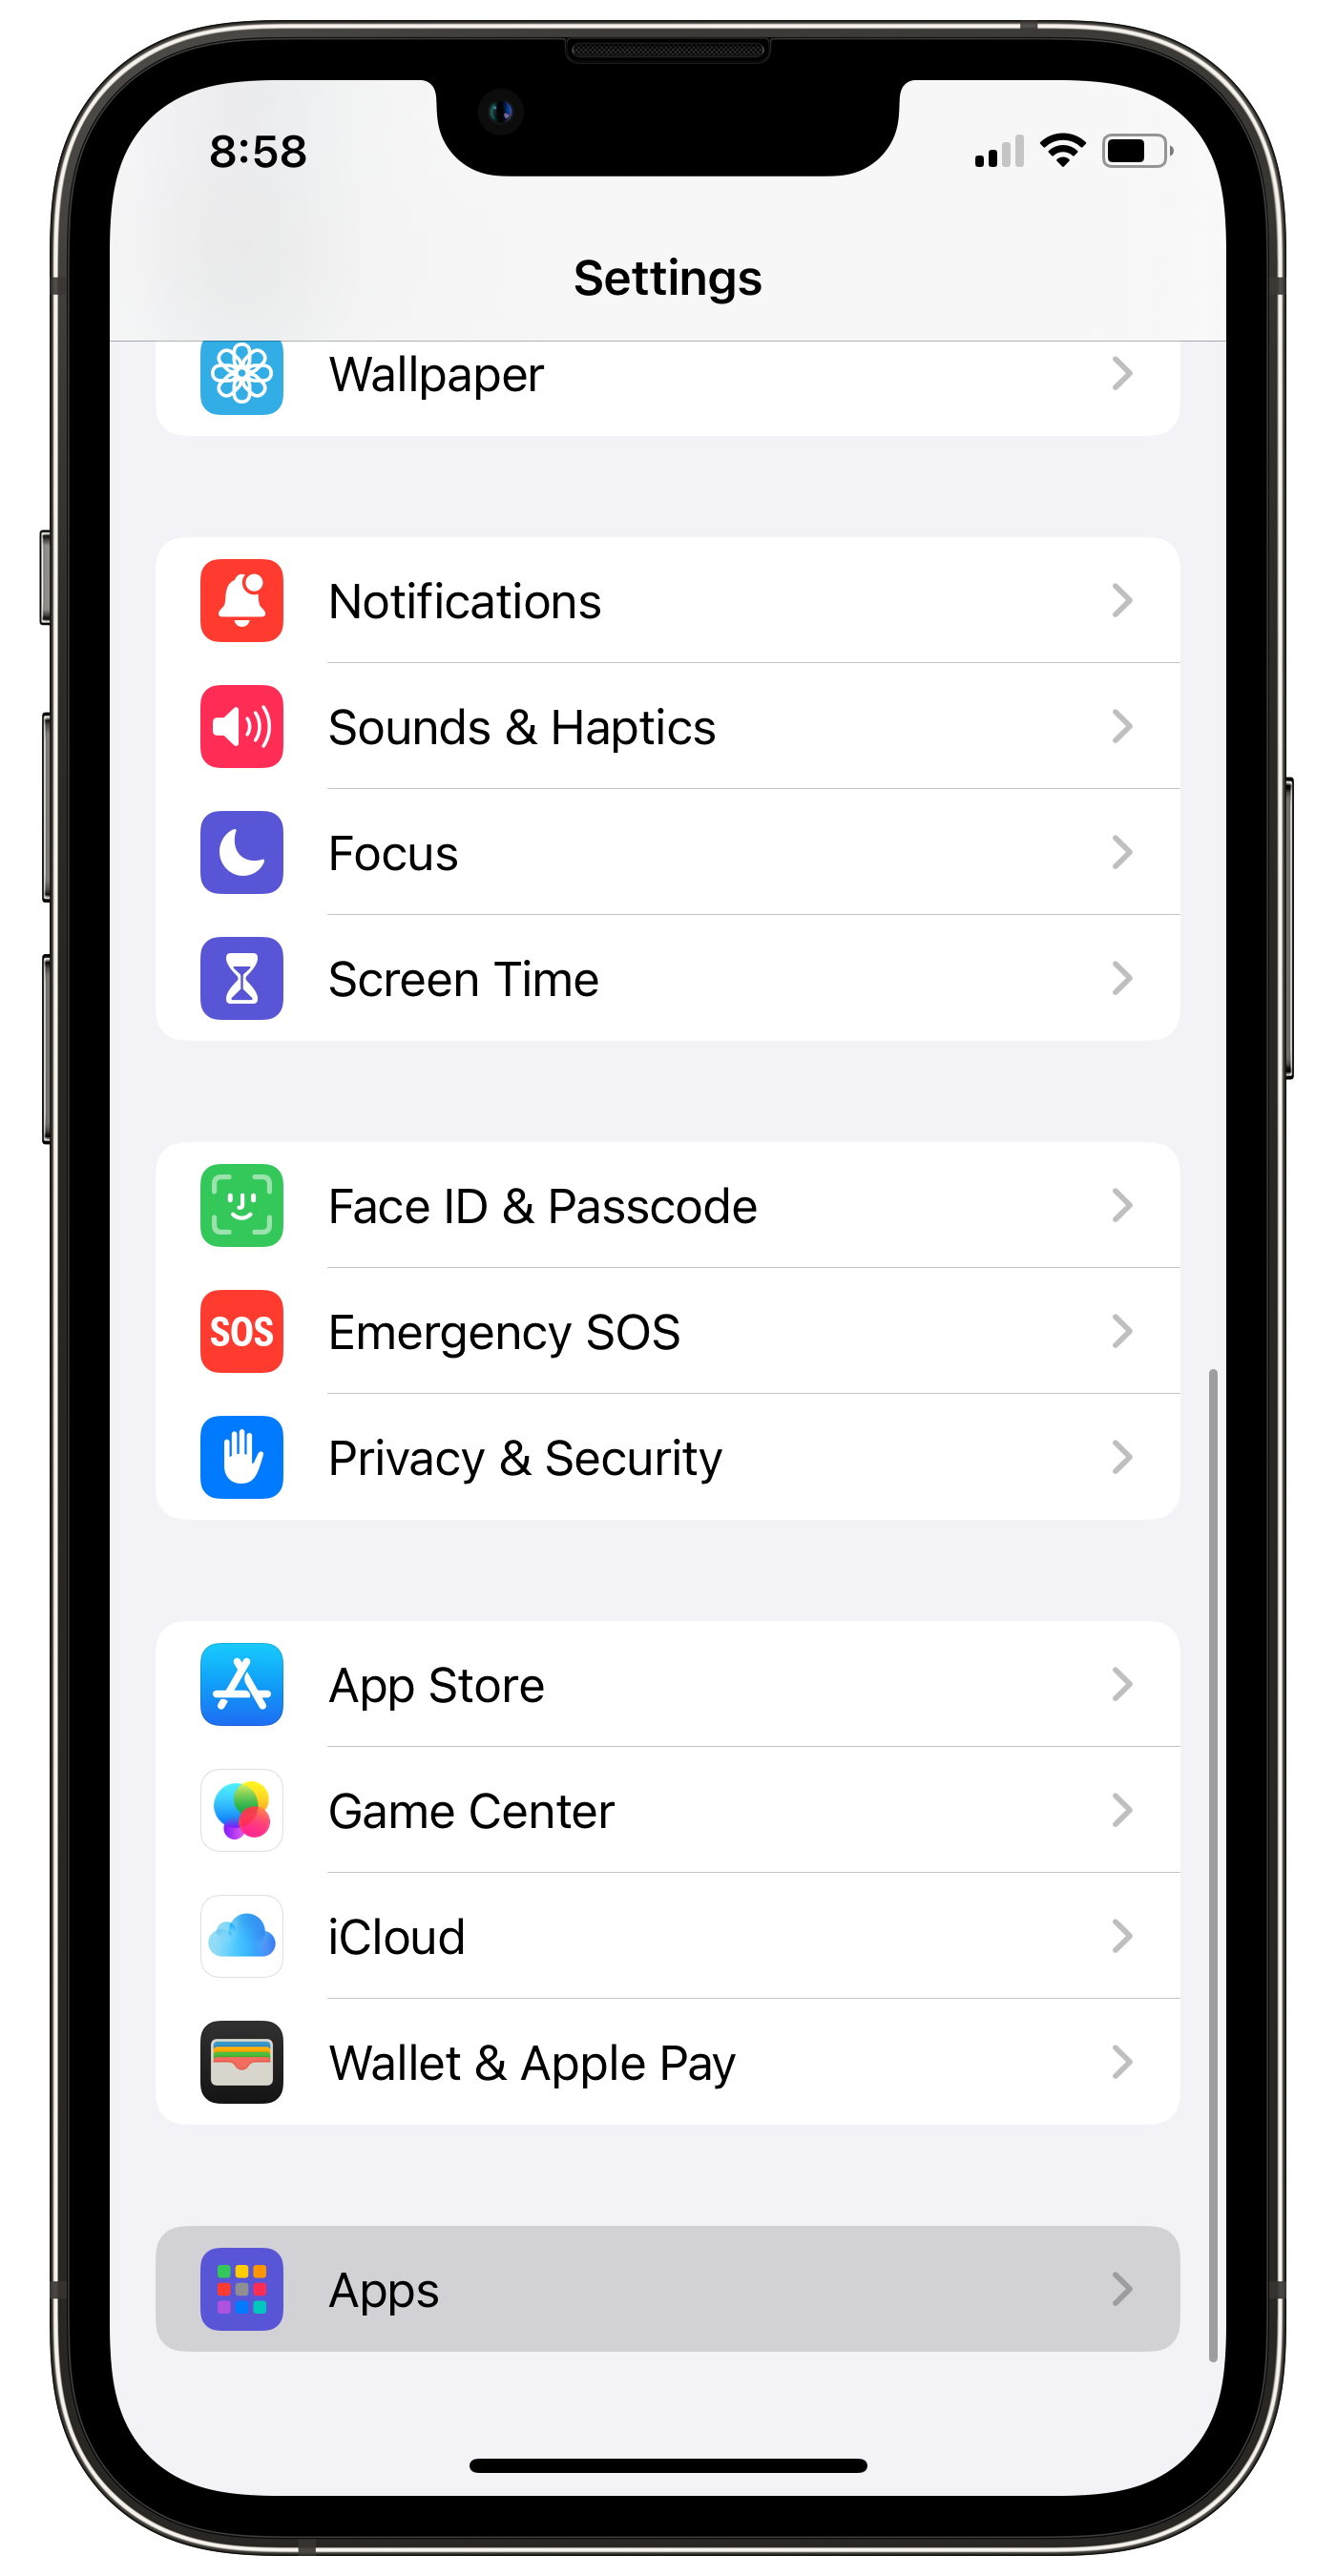
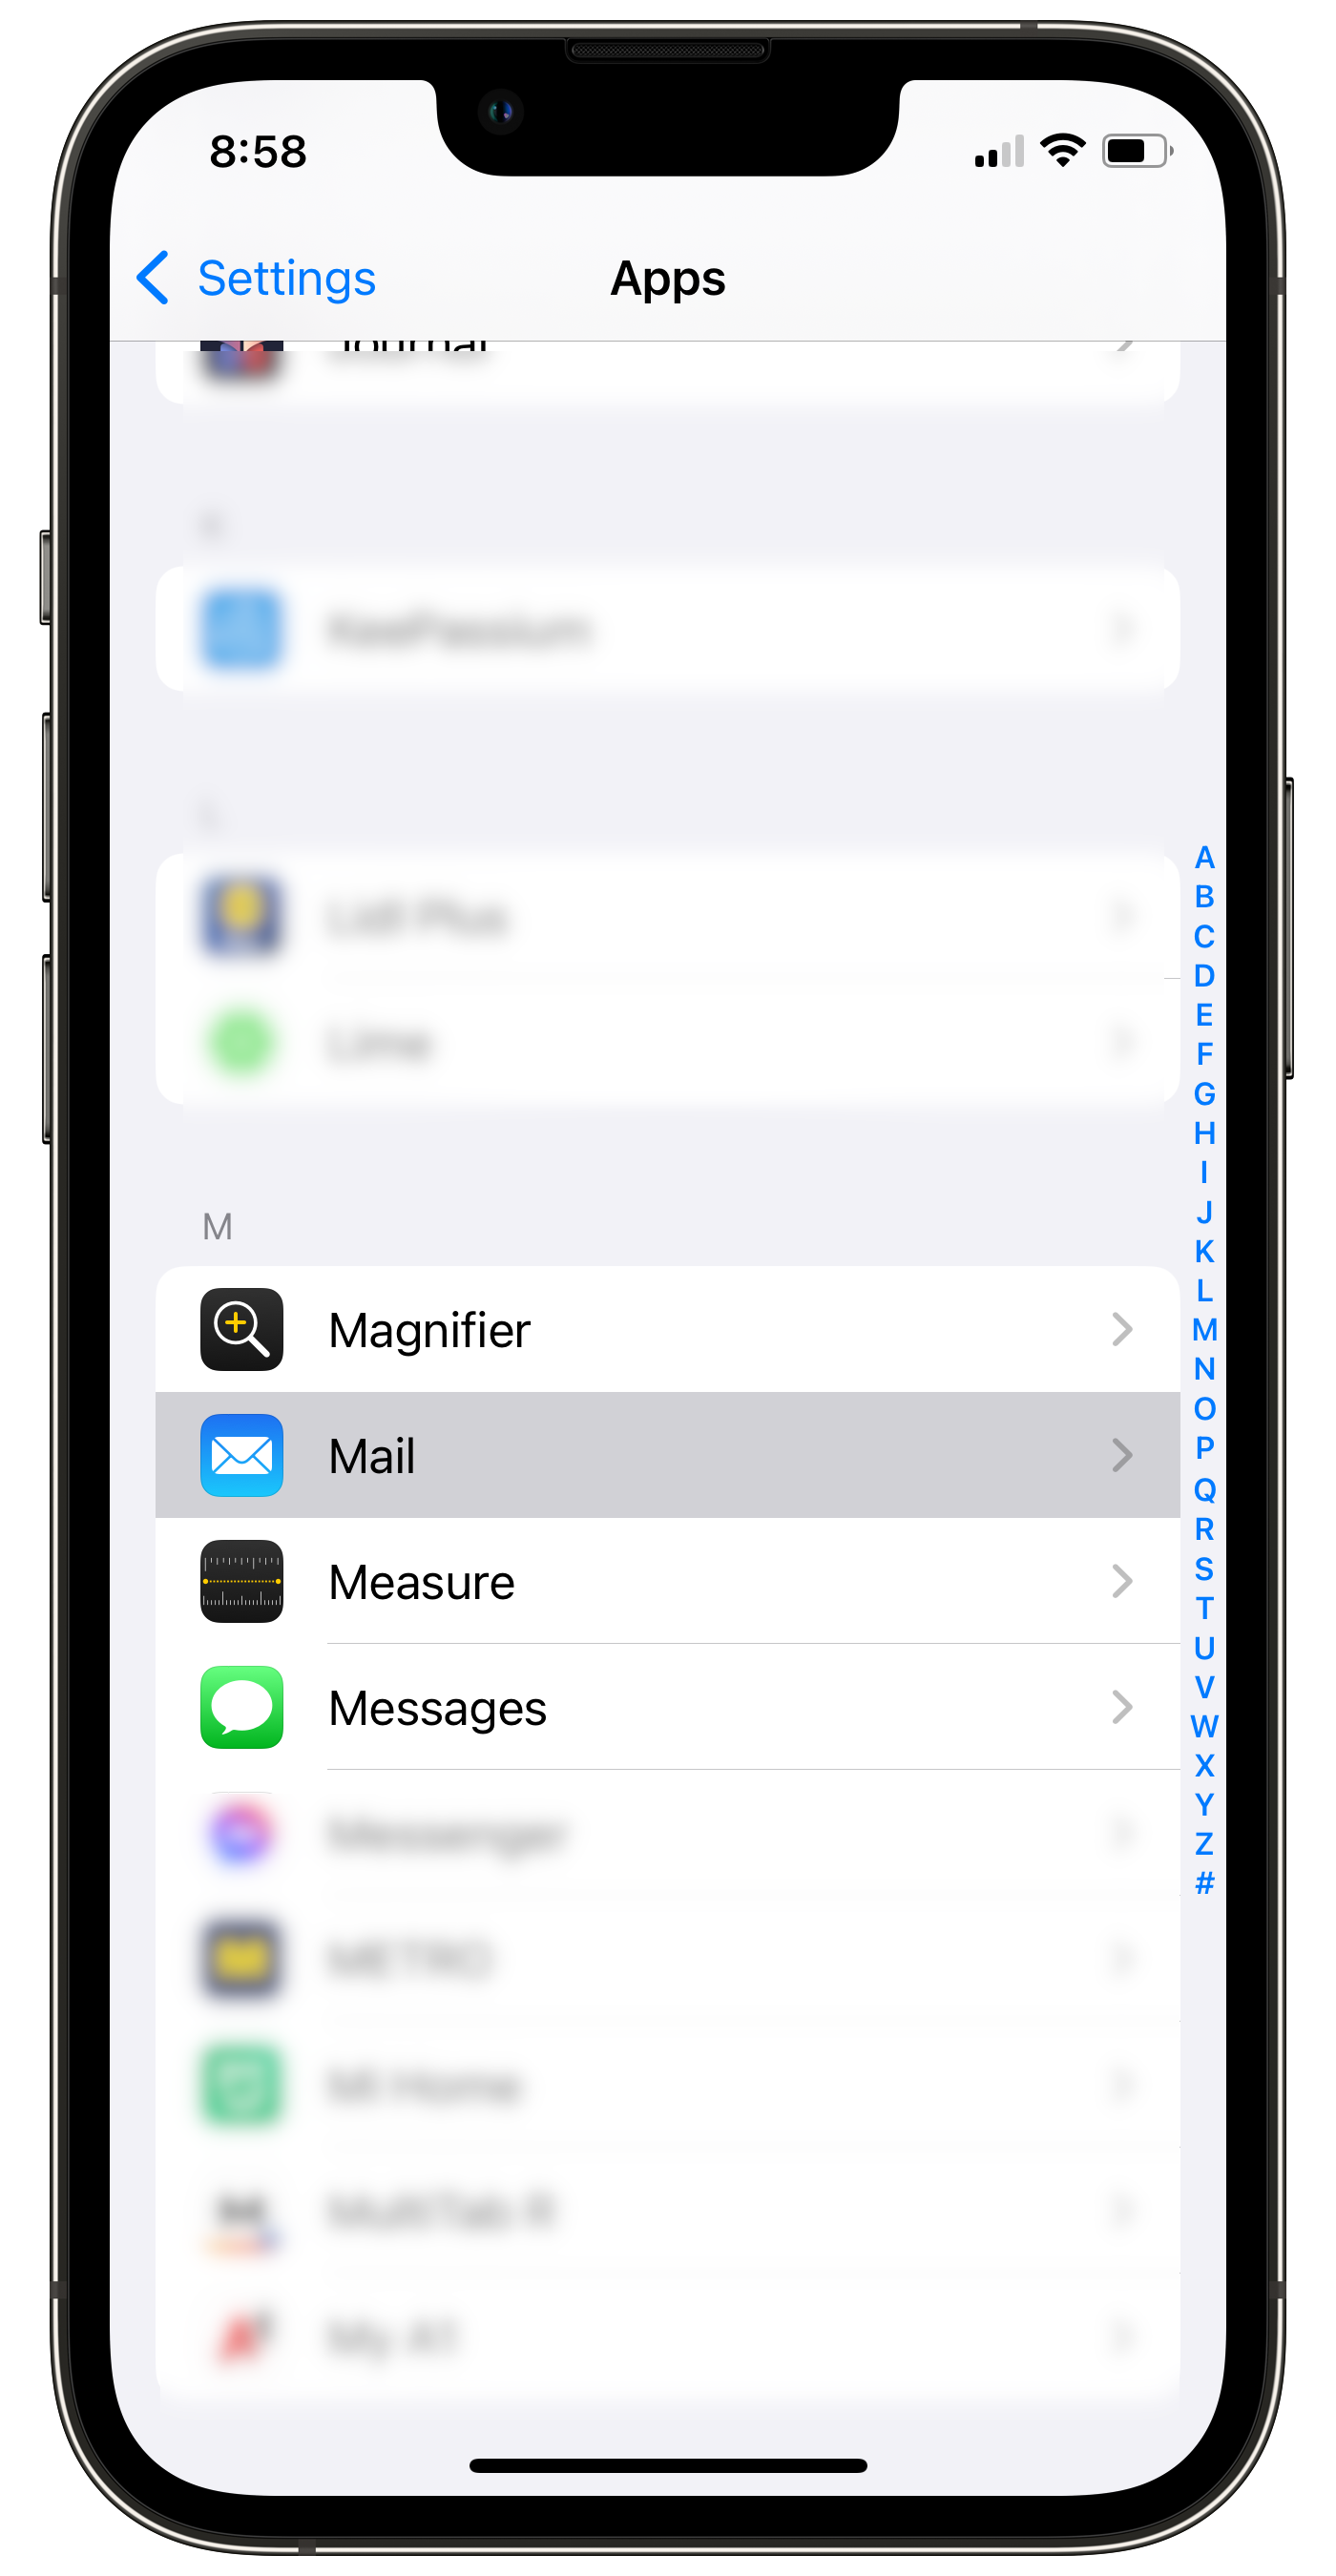
- Go to Settings > Apps > Mail.
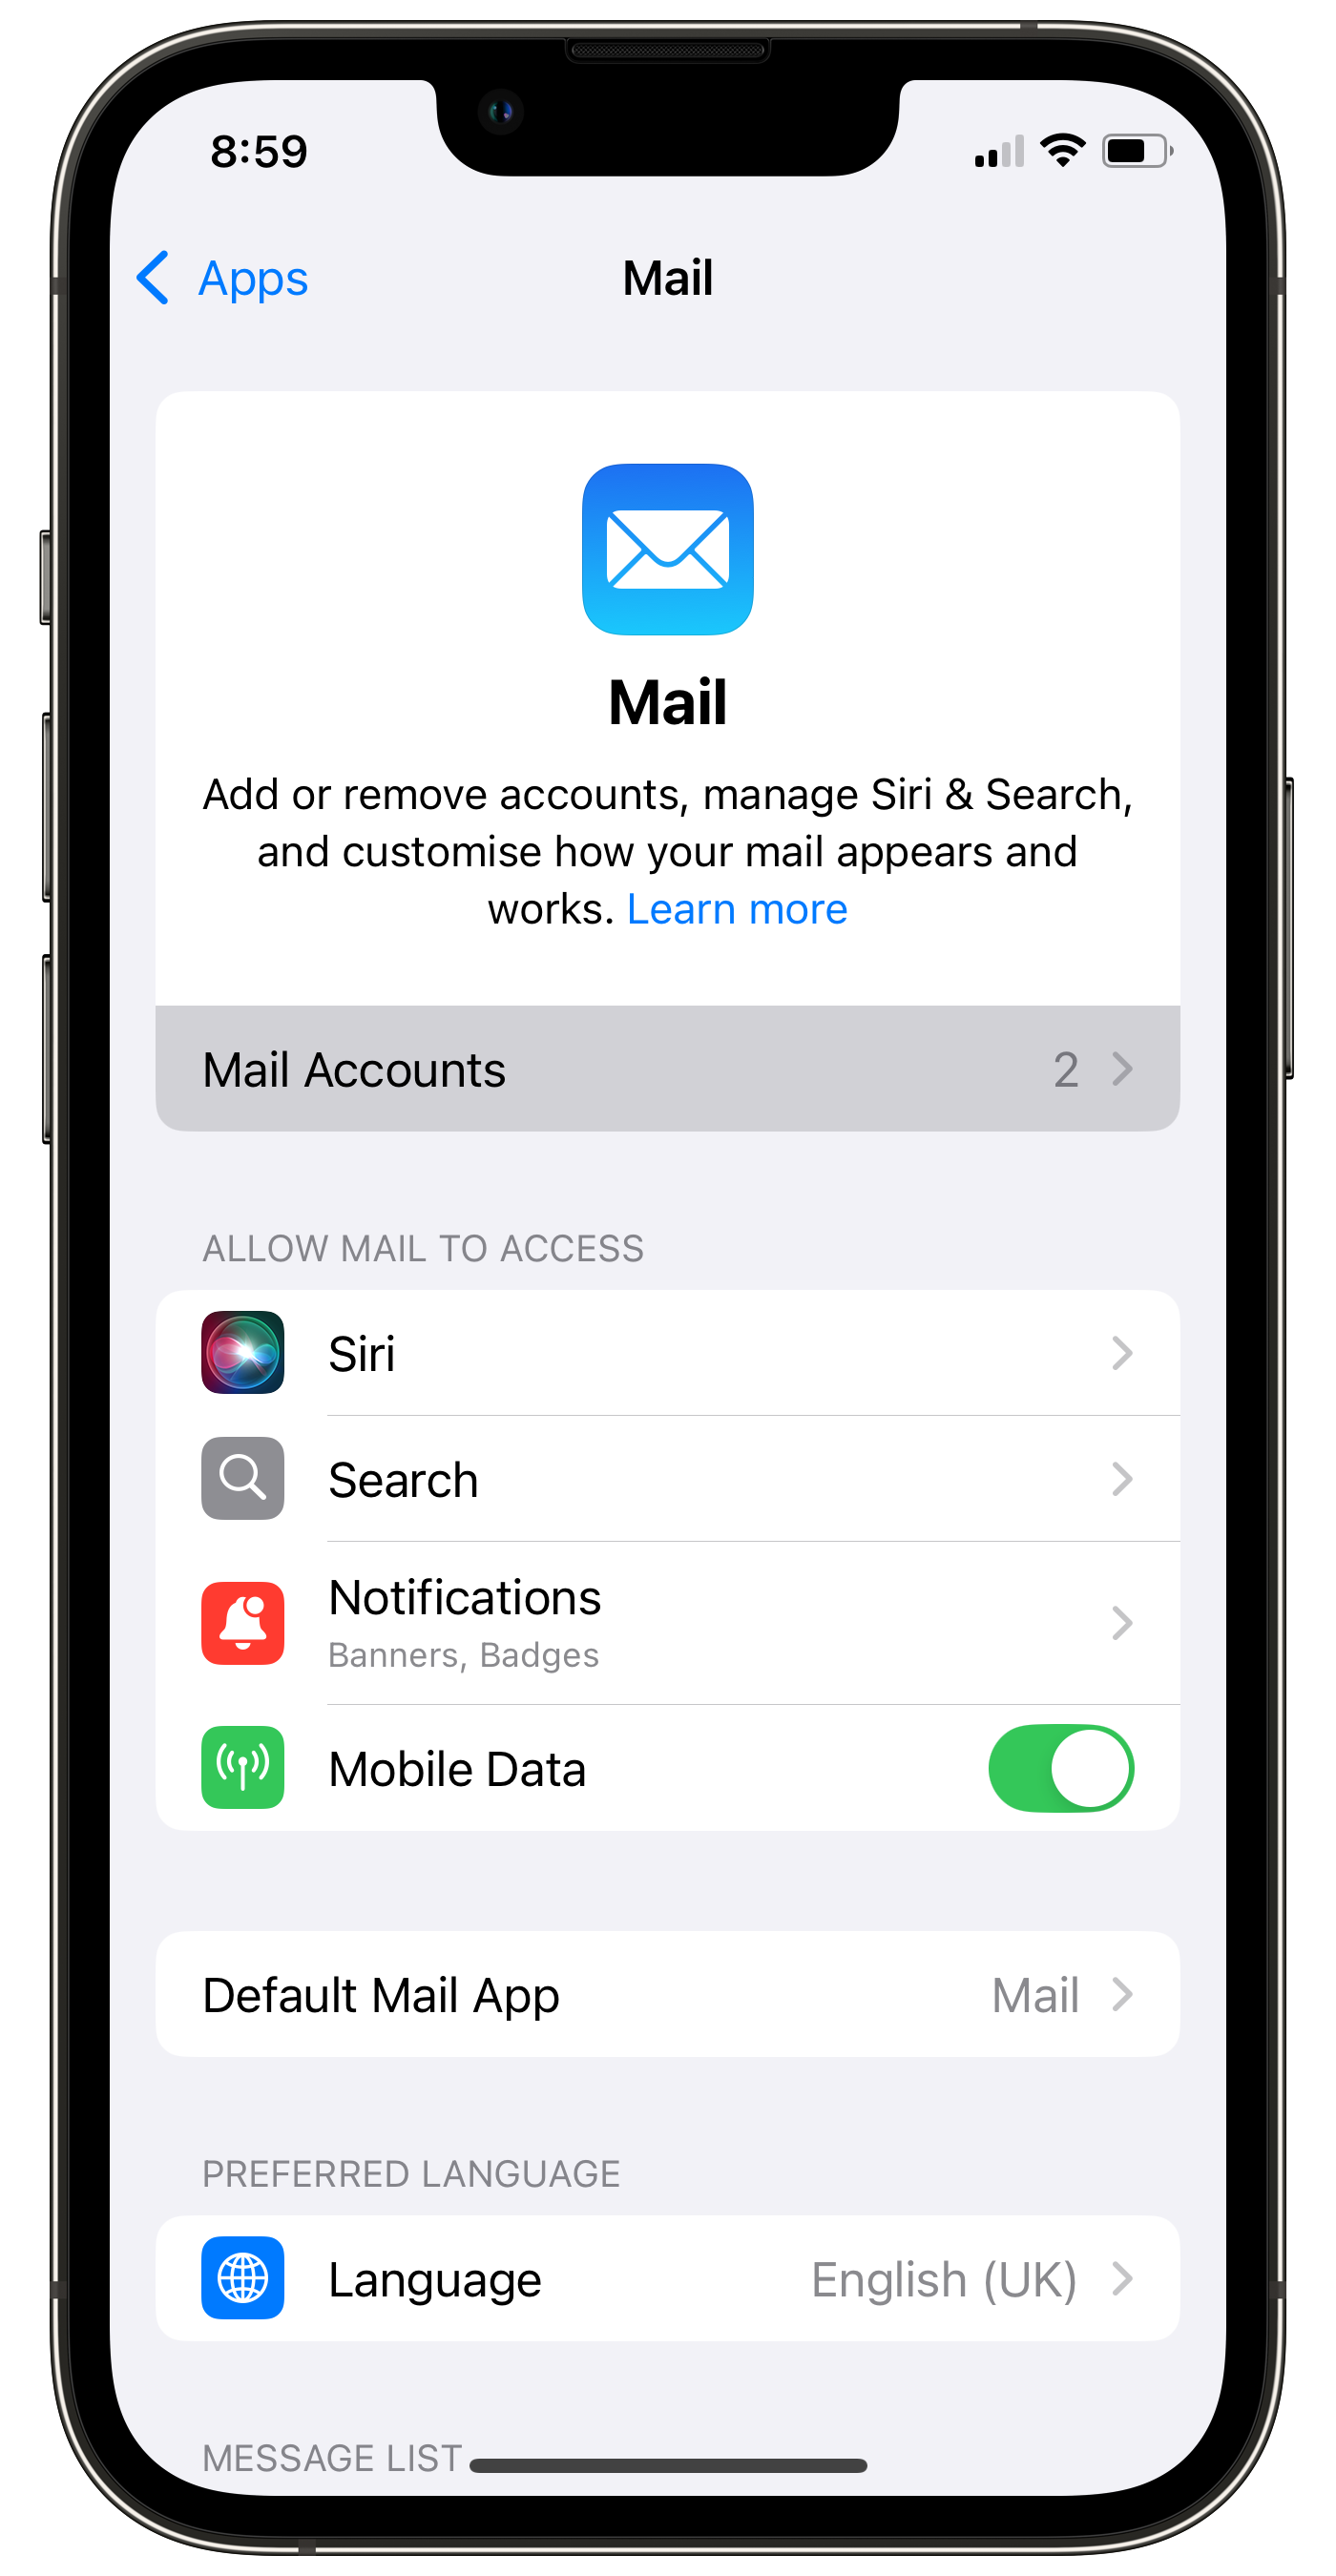
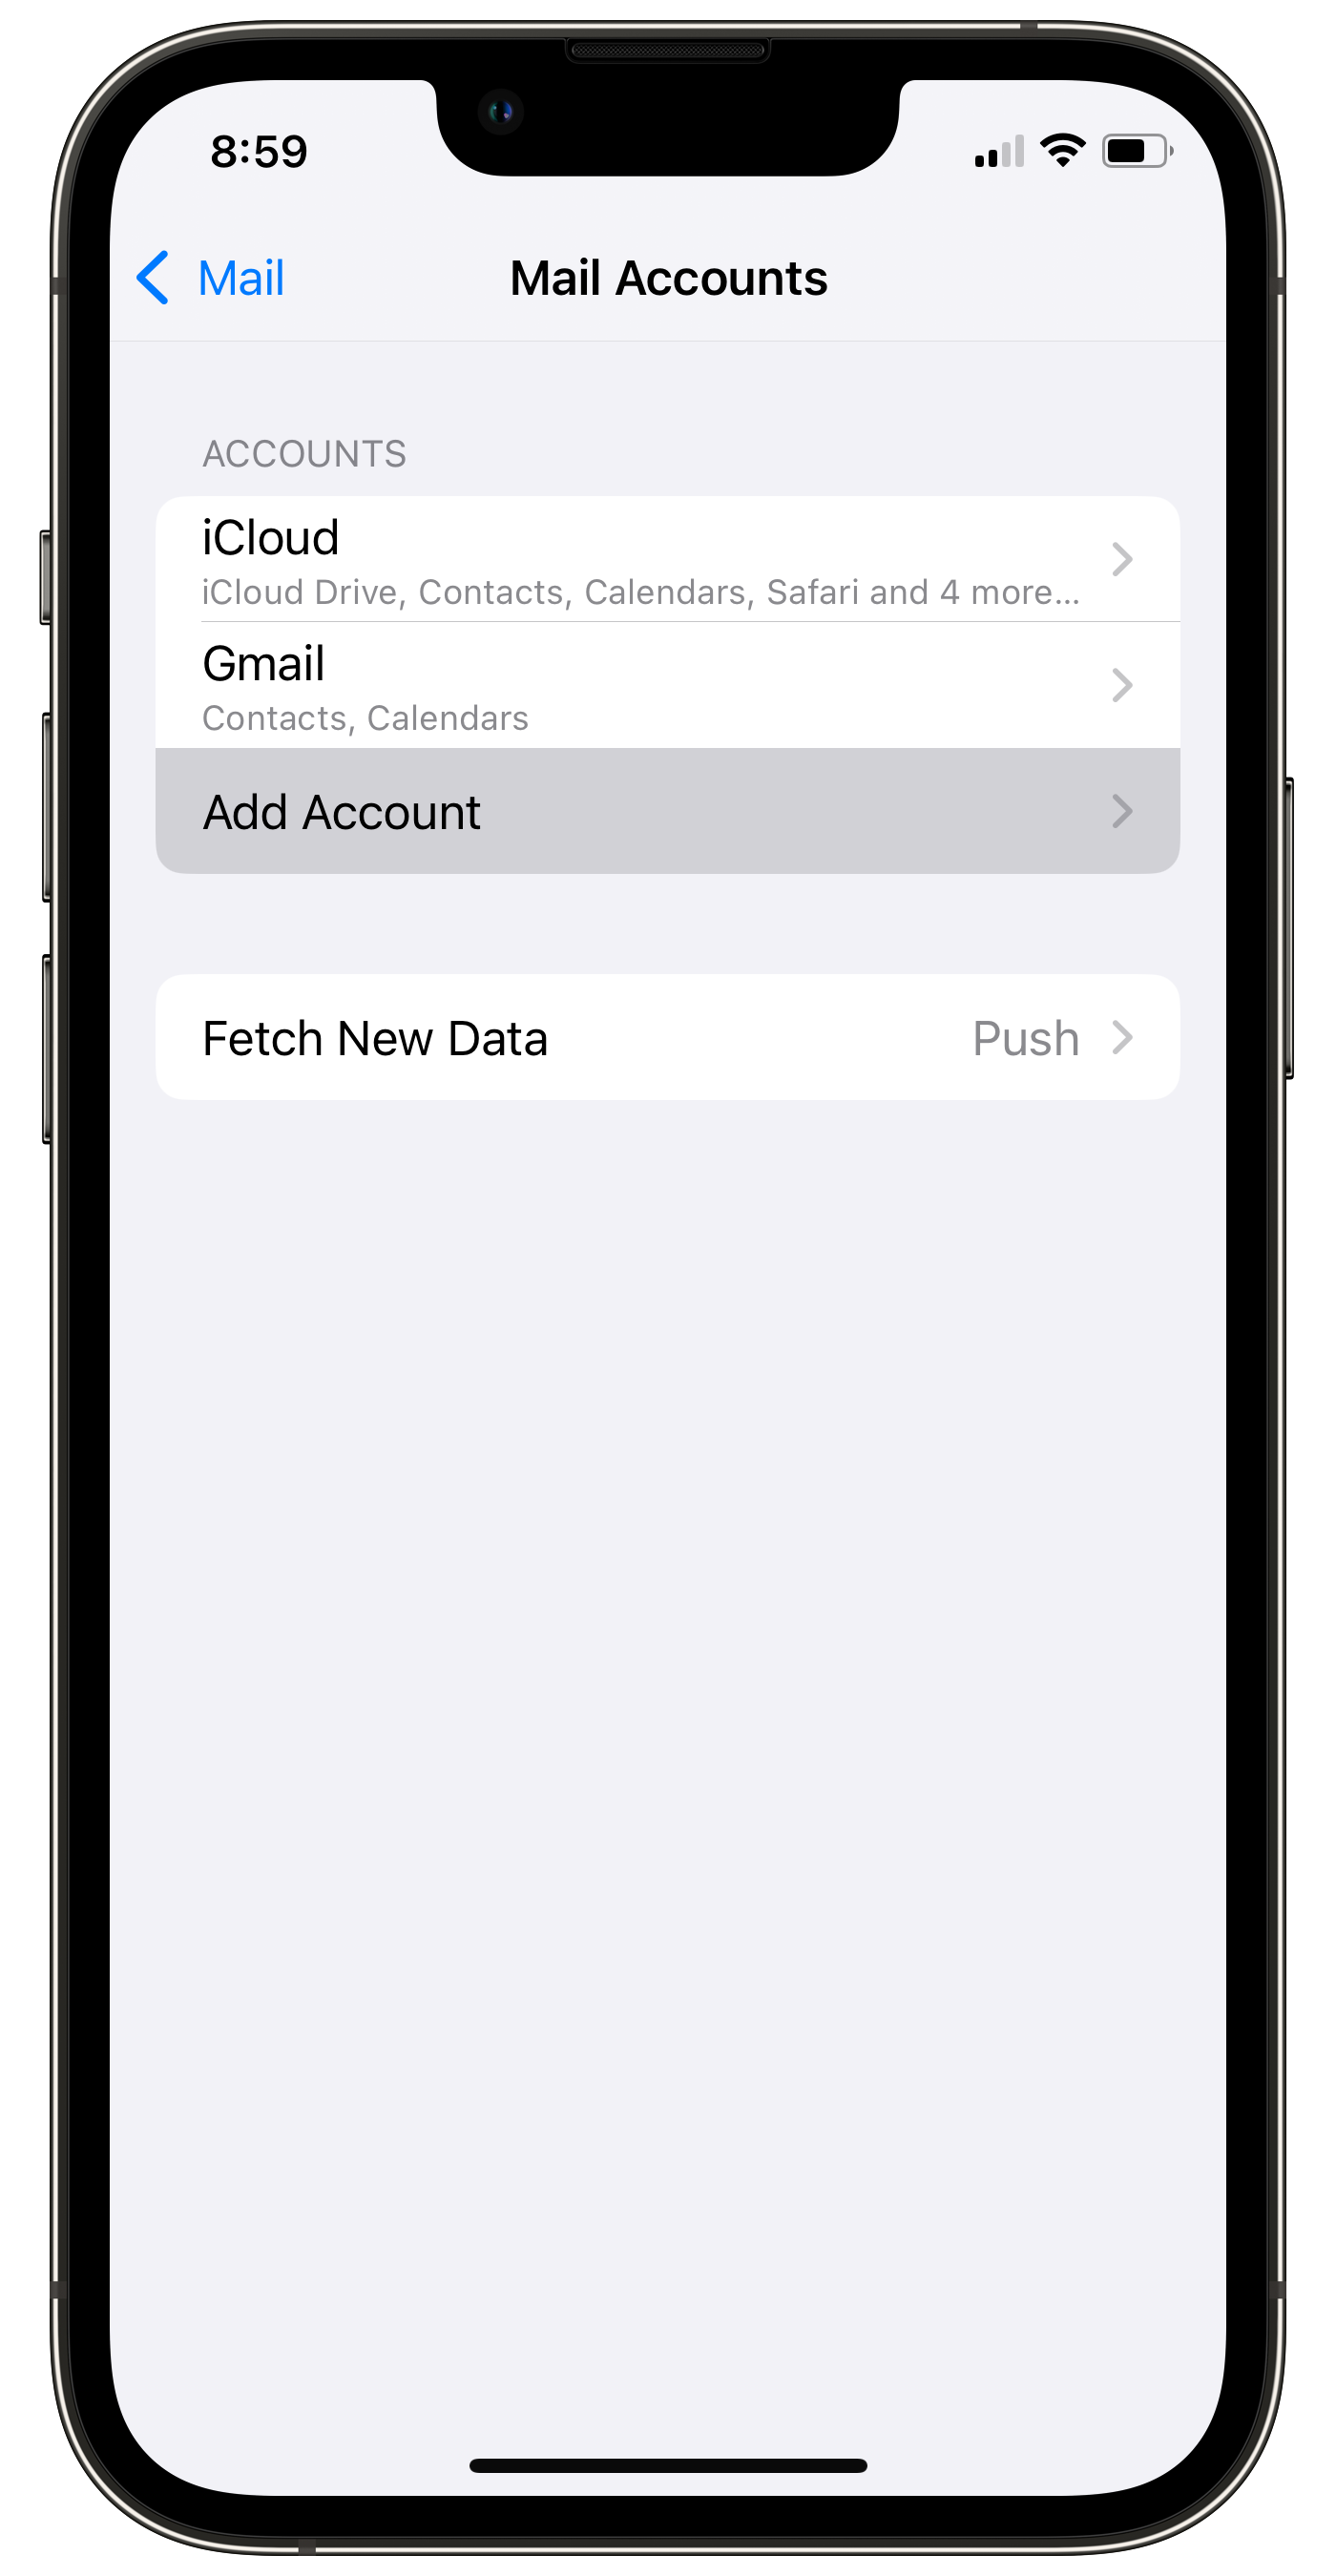
- Tap Mail Accounts > Add Account > Other > Add Mail Account.
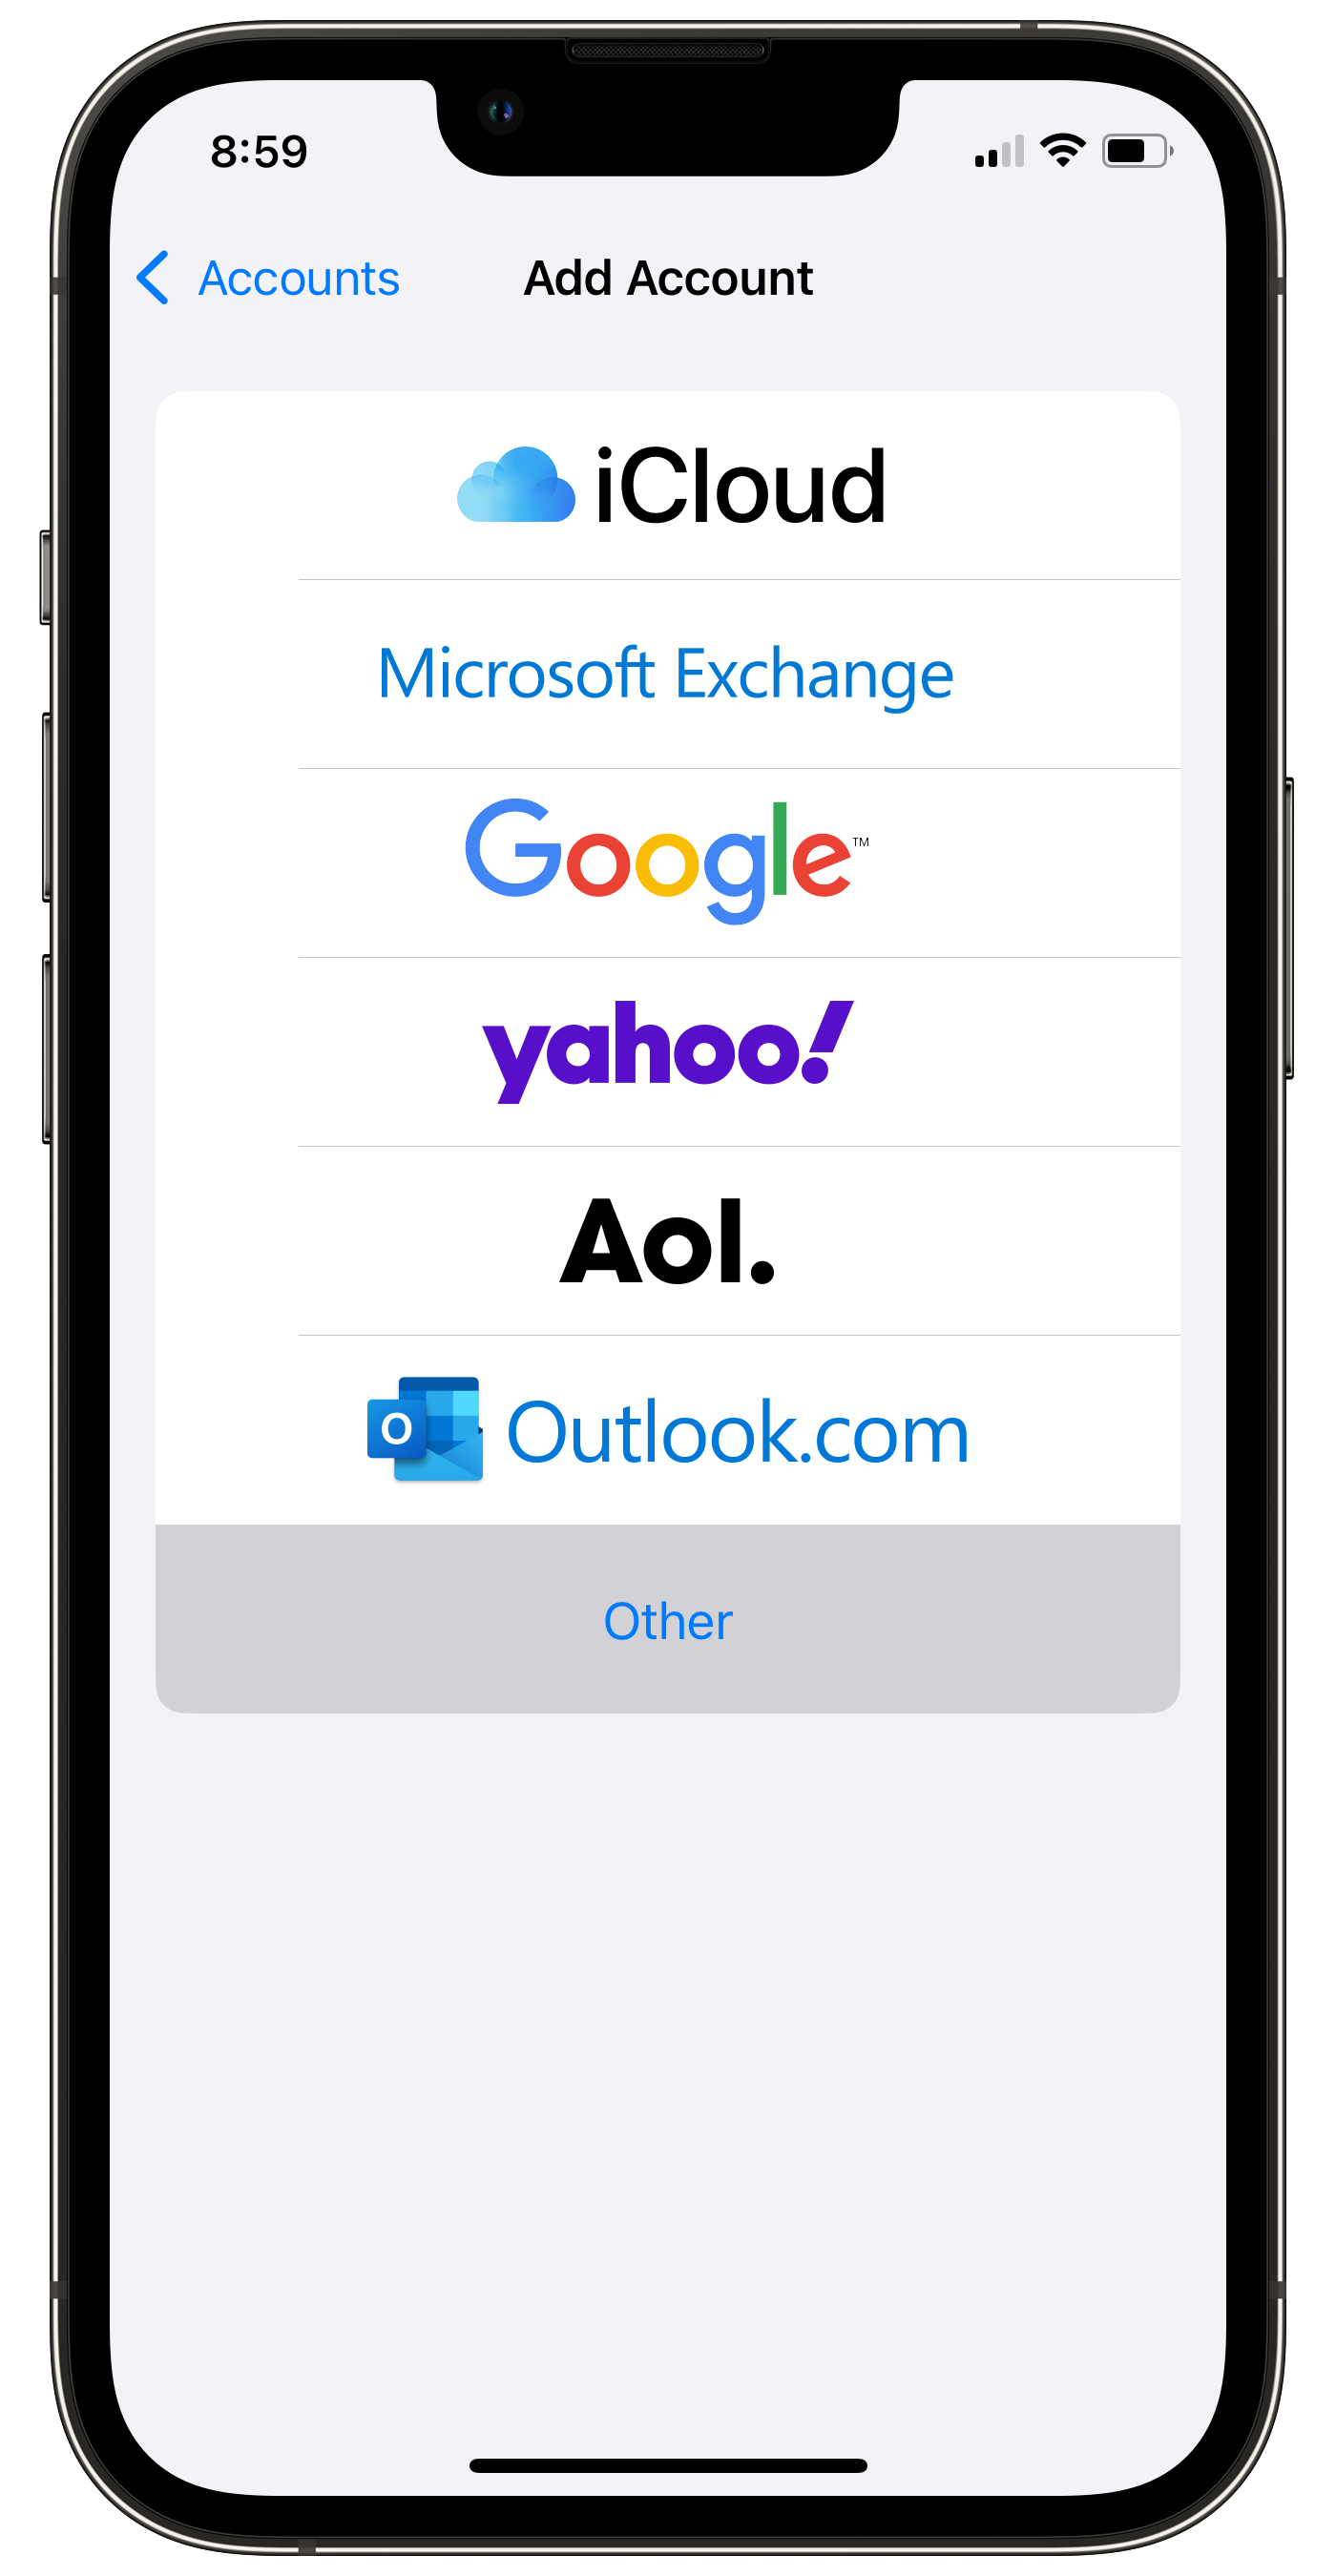
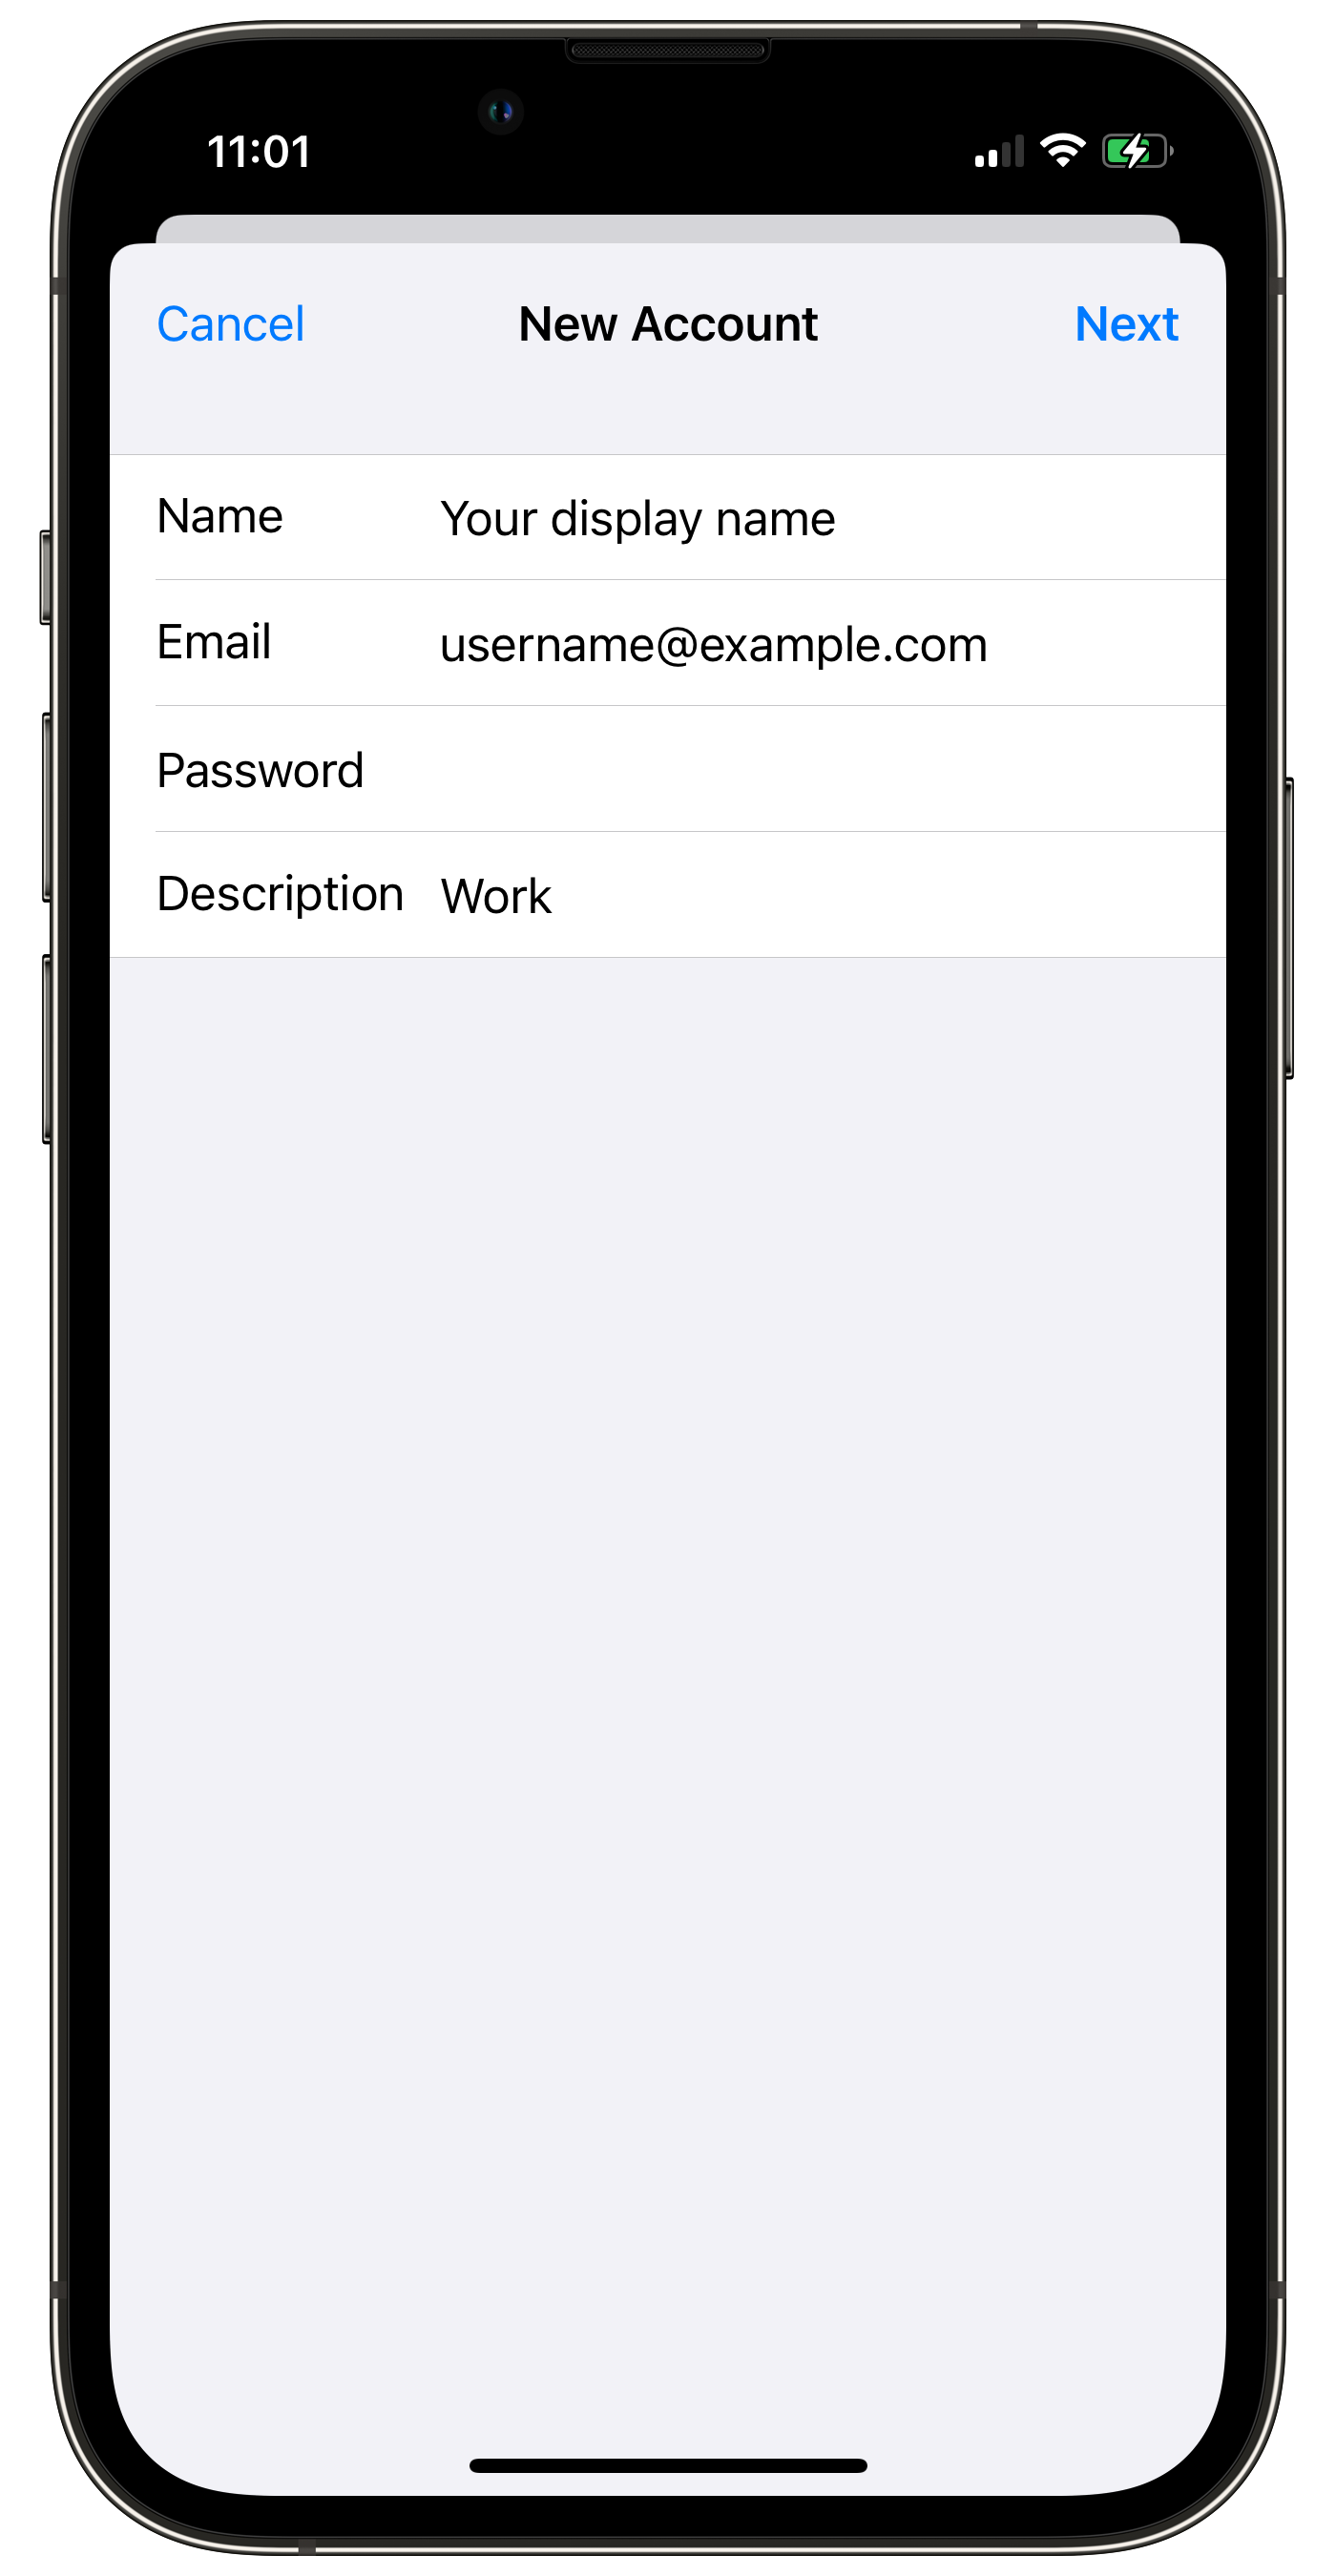
2. Enter Account Information:
- Name: Your display name (appears in sent emails)
- Email:
username@example.com - Password: Your email password
- Description: Label the account (e.g., "Work" or "Personal")
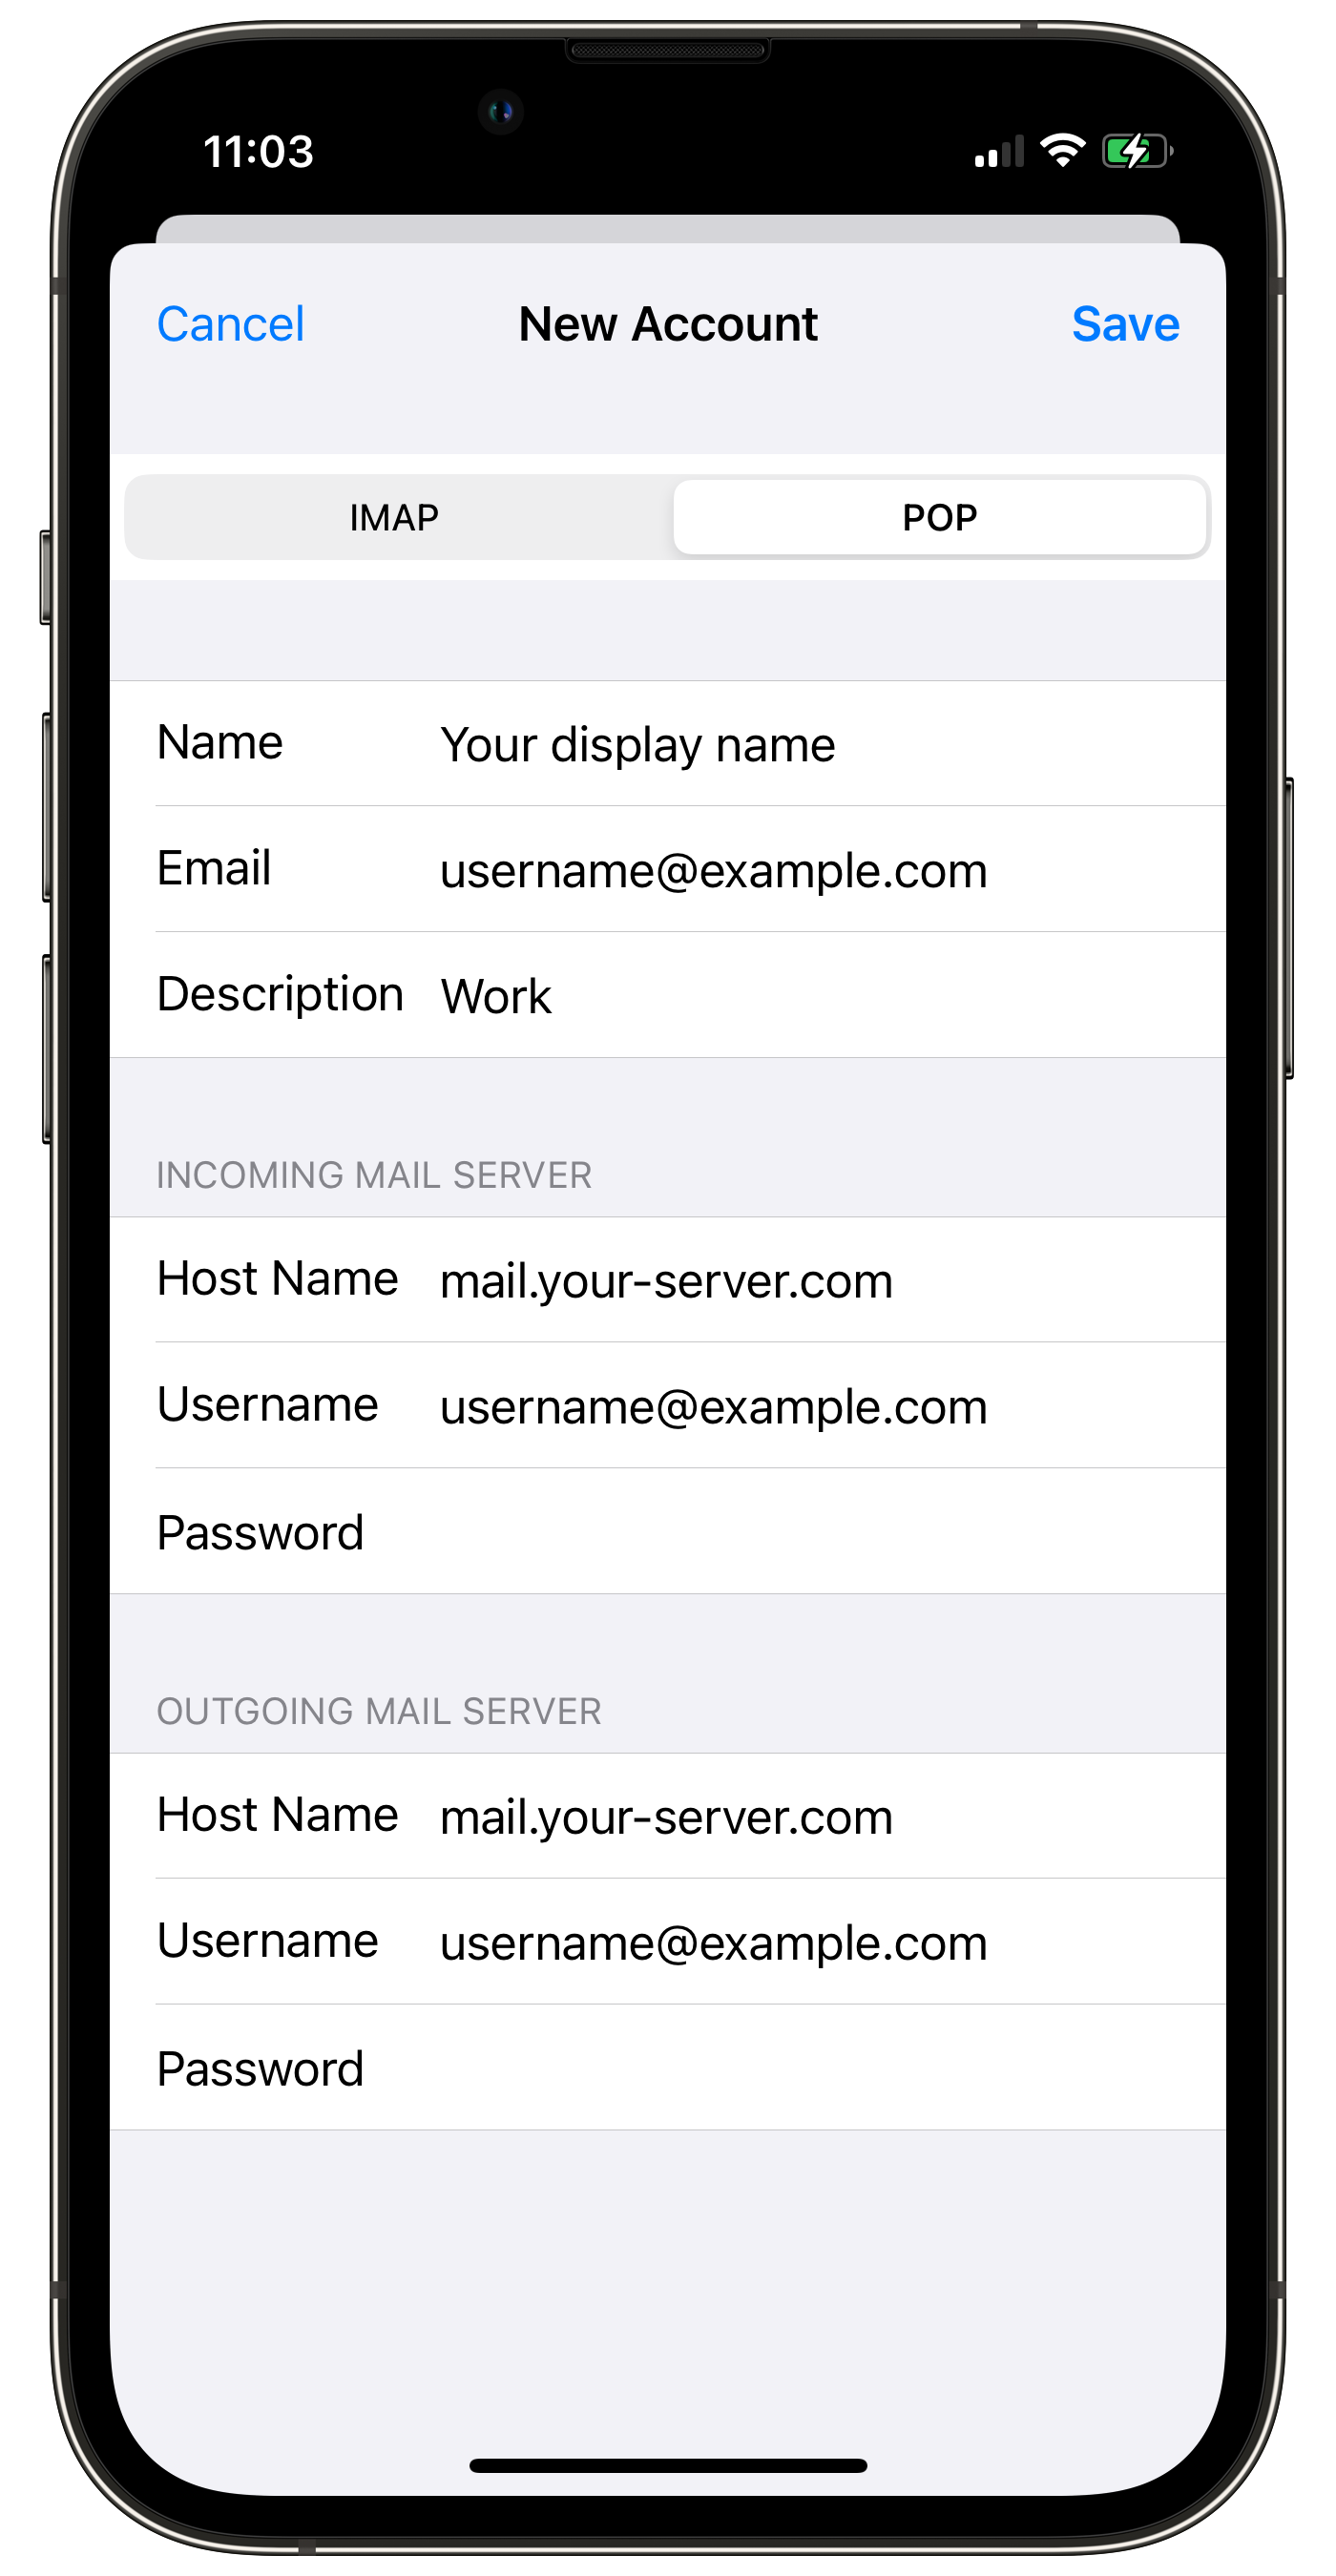
3. Configure Server Settings:
Choose POP and enter the following:
Incoming Mail Server:
- Host Name:
mail.your-server.com - Username:
username@example.com - Password: Your email password
Outgoing Mail Server:
- Host Name:
mail.your-server.com - Username:
username@example.com - Password: Your email password
4. Save and Finish:
- Tap Done to complete the setup.
Your email account is now configured!
 | You may miss some e-mail messages if you use POP3 to access a mailbox that has SpamAssassin enabled for it. Please read our Possible issues when using POP3 and SpamAssassin article for more information. |