Configuring Calendar for Mac (CalDAV)
You need to follow these steps to configure Calendar for Mac for accessing a Baïkal CalDAV installed on your account.
Please replace:
 | username with your Baïkal username baikal.example.com with the subdomain where you installed Baïkal |
1. Open Calendar.
2. Choose "Calendar" -> "Add Account..."
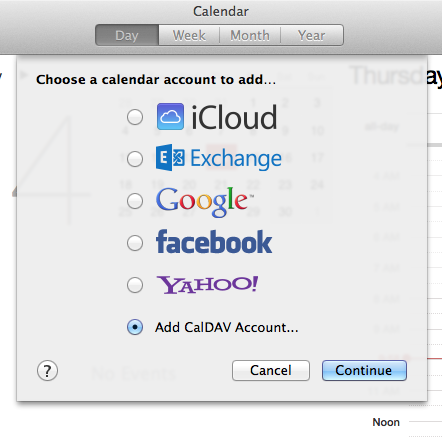
3. Choose "Add CalDAV Account..." and click on the "Continue" button.

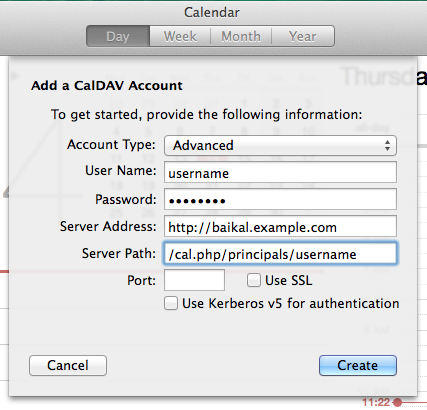
4. Choose "Advanced" for "Account Type". In the "Username" and "Password" fields, you need to enter your Baïkal username and password. In the "Server Address" field, you need to enter "http://baikal.example.com" where "baikal.example.com" is the subdomain where you installed Baïkal. In the "Server Path" field, you need to enter "/html/cal.php/principals/username" where "username" is the Baïkal username for the calendar.
Note: In Baïkal 0.8.0+, you can view the configuration settings by clicking on the "i" button next to each calendar within the Baïkal CalDAV dashboard.
Click on the "Create" button.

5. Calendar will ask you for your Baïkal password. Enter it and click on the "OK" button.