Running a MongoDB instance
This tutorial will show you how to use the already installed MongoDB on the server, as well as install a custom MongoDB instance.
If you do not have a Web Apps section in your hosting Control Panel, then this tutorial is not suitable for your particular hosting environment. You can ask your hosting provider for more information, or you can seek assistance through our ticketing system.
1. Using the hosting server's MongoDB packages to start an instance of MongoDB
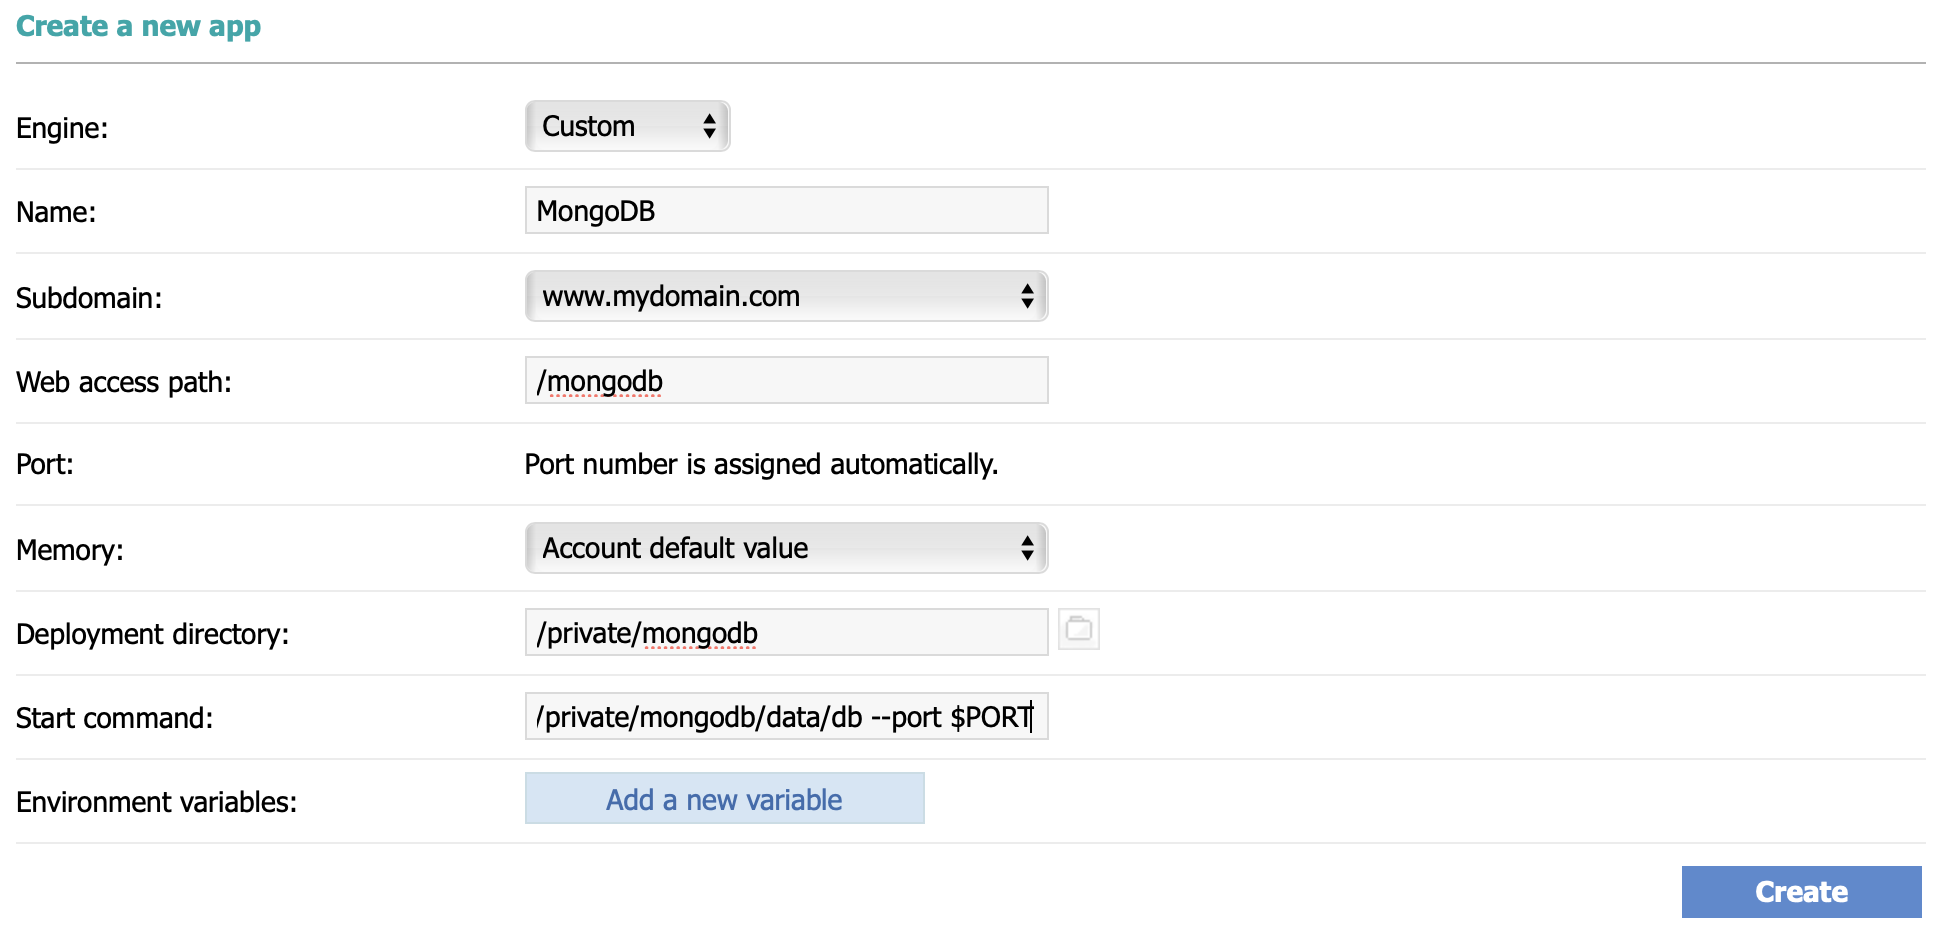
You can run a MongoDB instance by using the MongoDB binaries installed on the hosting server by default. If port and dbpath parameters are not defined in the start command, the MongoDB instance will run with the default parameters - port 27017 and dbpath /data/db. As the port for the app is assigned automatically, and hosting accounts do not have access to /data/db, you just need to set different port and dbpath parameters when starting your MongoDB instance. First, you need to create the database data directory. In this example, we will use /home/myusername/private/mongodb/data/db. Make sure that the database data directory exists. Through the Web Apps section in your hosting Control Panel, create a new app for running the MongoDB instance. In this example, we name the app MongoDB.

The start command is:
mongod --dbpath /home/myusername/private/mongodb/data/db --port $PORT
After you enable the app by clicking on the red circle, click the Refresh button until the circle is green, the State is OK, and the Status is Up. Then you can visit http://www.mydomain.com/mongodb to check if the application is running. You should receive a message saying "It looks like you are trying to access MongoDB over HTTP on the native driver port."
2. Installing a custom MongoDB instance
If you want your project to use a version of MongoDB that is different than the one installed on the server by default, then you need to follow the steps below:
1) Connect to your account via SSH.
2) Navigate to the location from which MongoDB will run. In this example, we use /home/myusername/.local/bin.
myusername@s501:/home/myusername$ cd .local/bin3) Download the binary files for the desired release of MongoDB. You can download the binaries from https://www.mongodb.com/download-center/community. You need to select the version, choose "Debian 10.0" as Platform, choose "shell (tgz)" as package, and click the "copy link" button to copy the download link. In this example, the download link is "https://fastdl.mongodb.org/linux/mongodb-shell-linux-x86_64-debian10-5.0.3.tgz". Then, download the file to the server with curl by running:
myusername@s501:/home/myusername/.local/bin$ curl -O https://fastdl.mongodb.org/linux/the_name_of_the_current_package.tgz
4) Extract the files from the downloaded archive with tar. For example, through the shell, you can extract with a tar command:
myusername@s501:/home/myusername/.local/bin$ tar -zxvf the_name_of_the_current_package.tgz5) Copy the extracted binaries to the location from which MongoDB will run (e.g. /home/myusername/.local/bin).
myusername@s501:/home/myusername/.local/bin$ cp -R -n the_name_of_the_current_package/bin/* .
 | At the time of writing, the current package name at the mongoDB download page is mongodb-linux-x86_64-debian11-7.0.12.tgz, so the commands that need to be run are as follows:: cd ~/local/bin |
6) Ensure the location of the binaries is in the PATH variable. You should have the following line in your shell's rc file (/home/myusername/.bashrc):
export PATH=$HOME/.local/bin:$PATHIf you want to run the MongoDB binaries from a different location, make sure to add that location to the PATH variable:
export PATH=<mongodb-install-directory>/bin:$PATH
7) Create the deployment directory for the web app that will run your custom MongoDB instance, e.g. /home/myusername/private/mongodb. In the deployment directory, you should create the database data directory, e.g. /home/myusername/private/mongodb/data/db.
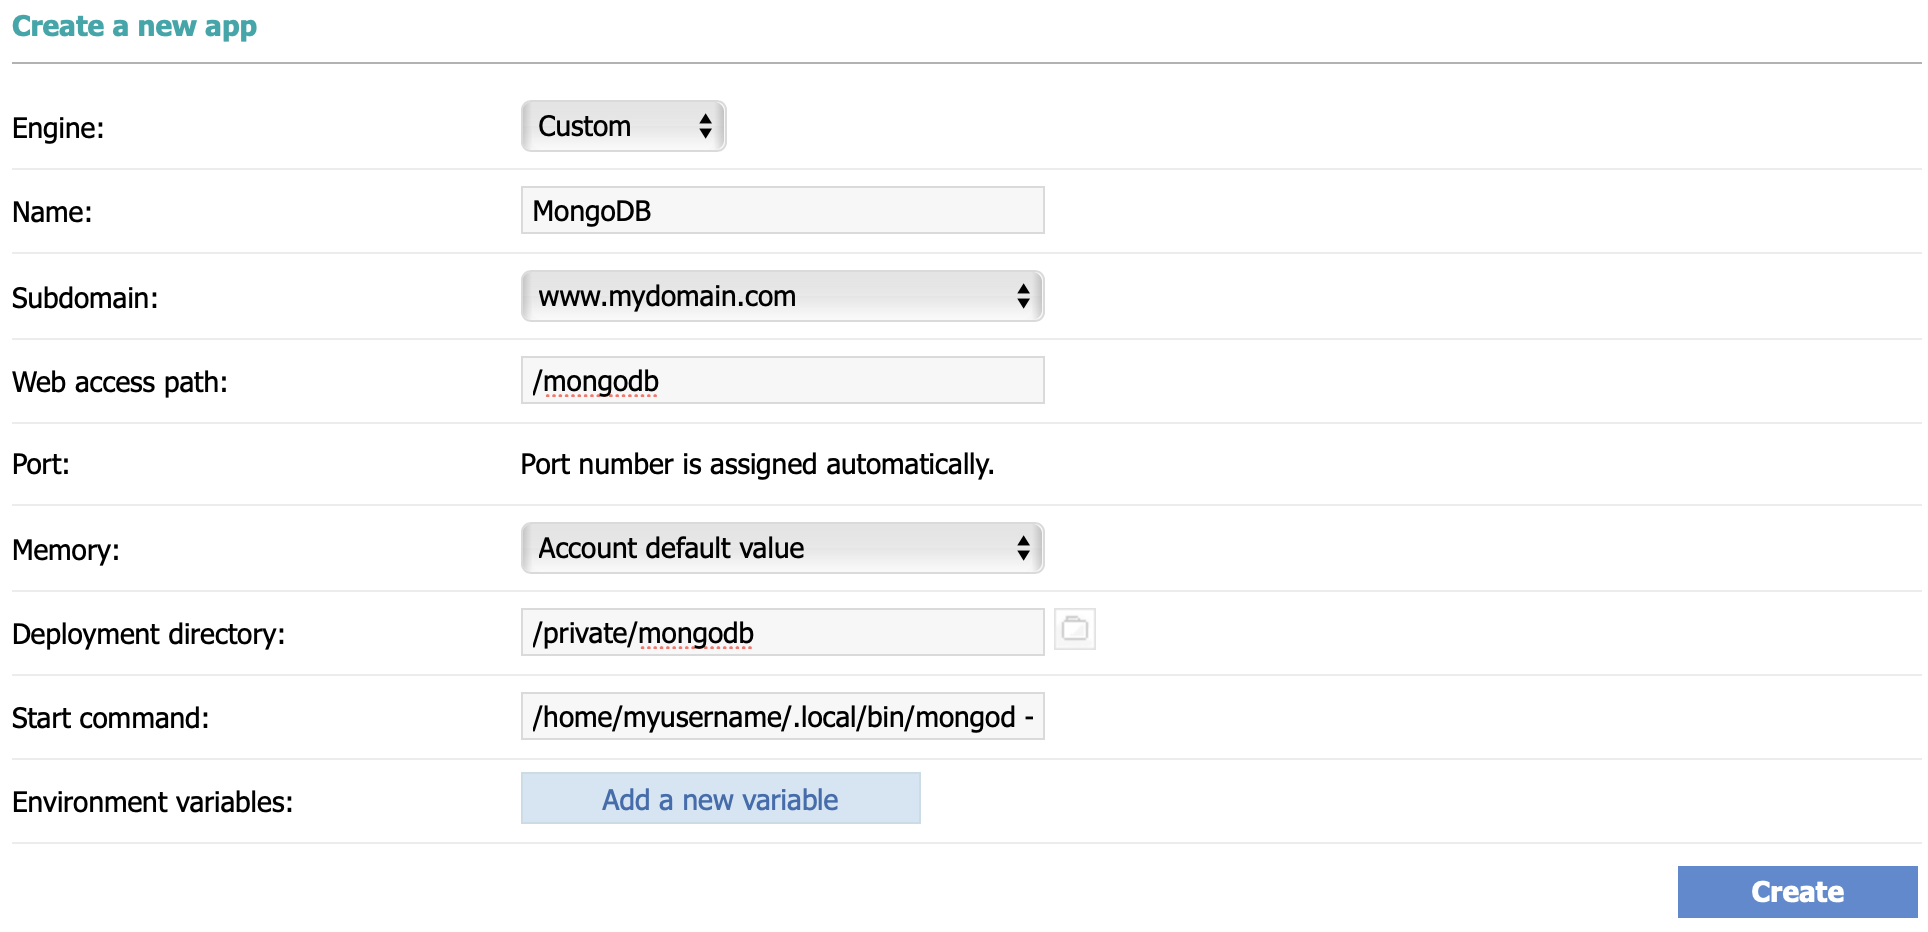
8) In the Web Apps section of the hosting Control Panel, create a new app. Our example app is named MongoDB.

The start command is:
/home/myusername/.local/bin/mongod --dbpath /home/myusername/private/mongodb/data/db --port $PORT9) Click the Create button. Then click on the red circle to start the app. Click the Refresh button to update the State and Status of the app. When the State is OK, and the Status is Up, your custom instance of MongoDB is running.

3. Enabling authentication
Enabling access control on a MongoDB deployment enforces authentication, requiring users to identify themselves. When accessing a MongoDB deployment that has access control enabled, users can only perform actions as determined by their roles. The following procedure first adds a user administrator to a MongoDB instance running without access control and then enables access control.
1) Through your shell, connect to the MongoDB instance.
mongosh --port $PORT
Note: The mongosh shell binary is the replacement of the mongo shell binary which has been deprecated since MongoDB v5.0.
2) Create the user administrator.
use admin
db.createUser(
{
user: "myUserAdmin",
pwd: "abc123",
roles: [ { role: "userAdminAnyDatabase", db: "admin" } ]
}
)
3) Disconnect the mongo shell.
4) Restart the MongoDB instance with access control. To do this, go to the Web Apps section of the hosting Control Panel and click on the green circle to stop the app. Then update the start command of the MongoDB app by adding the "auth" parameter:
/home/myusername/.local/bin/mongod --auth --dbpath /home/myusername/private/mongodb/data/db --port $PORT
5) Click the Update button to save the changes, and then click on the red circle to restart the custom MongoDB instance with access control.
4. Connecting to the database
The standard format of the MongoDB URI connection scheme looks like this:
mongodb://[username:password@]host1[:port1][,...hostN[:portN]]][/[database][?options]]
By following this example, you could access the database created in this tutorial with the following connection string:
mongodb://myUserAdmin:abc123@localhost:36375/admin